Get in Touch with Mackayhairscissors Company
We use submitted details to respond to your quote request. Read our Privacy Policy.

Updated July 2026 · Educational guide for professional hairstylists, barbers, and informed clients
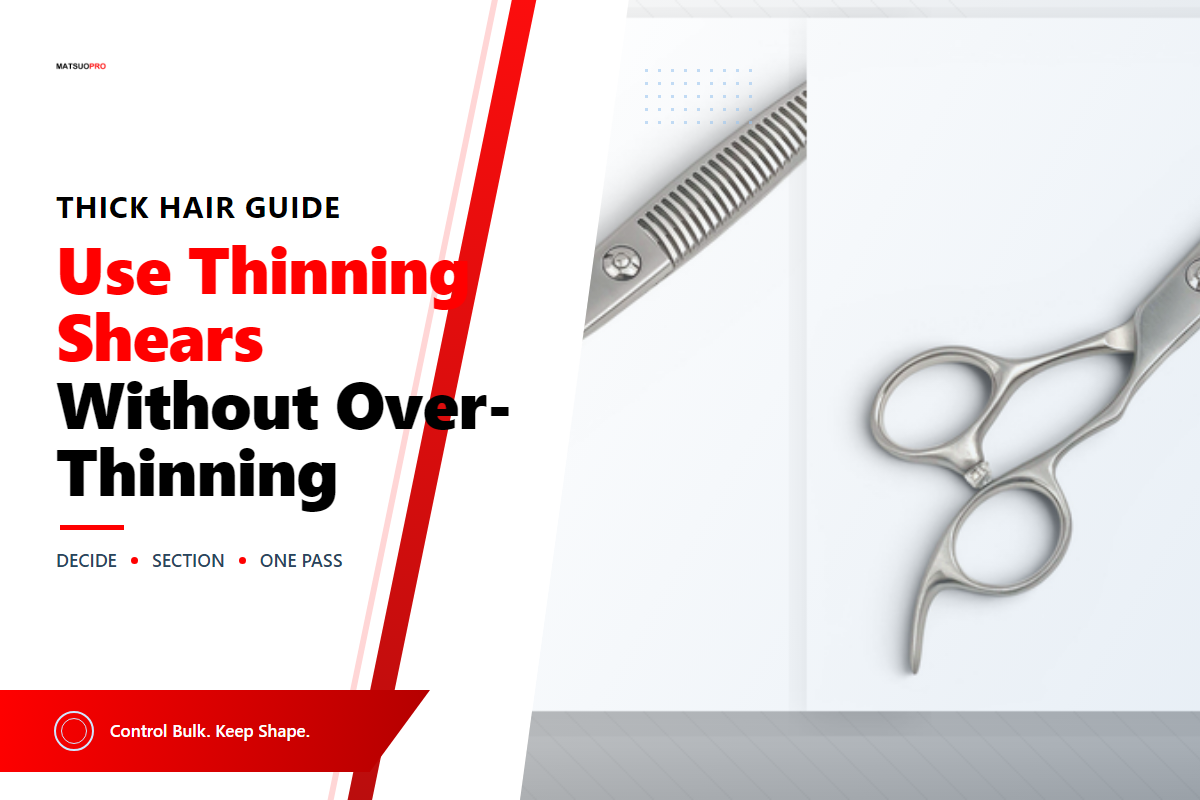
Thinning shears for thick hair are finishing tools used to remove selected internal weight after the haircut’s shape has been established. Density alone isn’t a reason to cut. A safer decision considers strand behavior, condition, and the client’s goal, then uses a small test section and a deliberate stop.
These shears are best used as a controlled finishing tool, not as a shortcut for building the shape. Check density, strand behavior, curl response, condition, and shape; make one conservative test; comb it out; then decide whether to stop.
In the approved Skills England Hairdressing Professional standard, cutting considerations include weight distribution, balance, natural growth, length, and evaluation of the finished result.
That decision-first approach is consistent with the Skills England Hairdressing Professional standard, which calls for cutting decisions to consider weight distribution, balance, natural growth, and the result being evaluated.
Use thinning shears only when the unwanted weight is inside an otherwise sound haircut and you can name the shape you intend to preserve. If the fullness comes from a blunt design, damaged surface, expanded curl pattern, or poor styling, removing more strands can make the result look wider, frizzier, or less connected.
A thinning shear cuts some hair strands and leaves others at each closure. When a professional cuts hair with thinning shears, that interrupted cut line can soften a dense internal area. It can’t redesign a weak perimeter, repair split ends, or decide where a layer should sit. The Skills England Hairdressing Professional standard lists thinning as one cutting technique within a broader process that considers weight distribution, balance, natural growth, length, and the intended result.
Don’t thin hair simply because it feels abundant in the hand. First identify whether the problem is internal weight, an unsuitable outline, surface expansion, or styling.
Decision rule for a hair stylist: Length, placement, and the intended shape should carry more weight than a texture label alone.
Home-use boundary: Readers may ask, “Can I use hair thinning shears to thin my hair?” or “Can I get my hair thinned?” A nonprofessional reader can use this guide to prepare questions and recognize stop signals, but short hair, visible internal pieces, curl shrinkage, chemical compromise, and any cut close to the scalp leave little room for self-correction. In those cases, use an in-person professional assessment instead of thinning thick hair at home.
For a tool overview, terminology, and adjacent shear categories, use the professional thinning shears hub. This article stays with technique and risk control.
Key takeaway: Density is a description, not a cutting instruction.
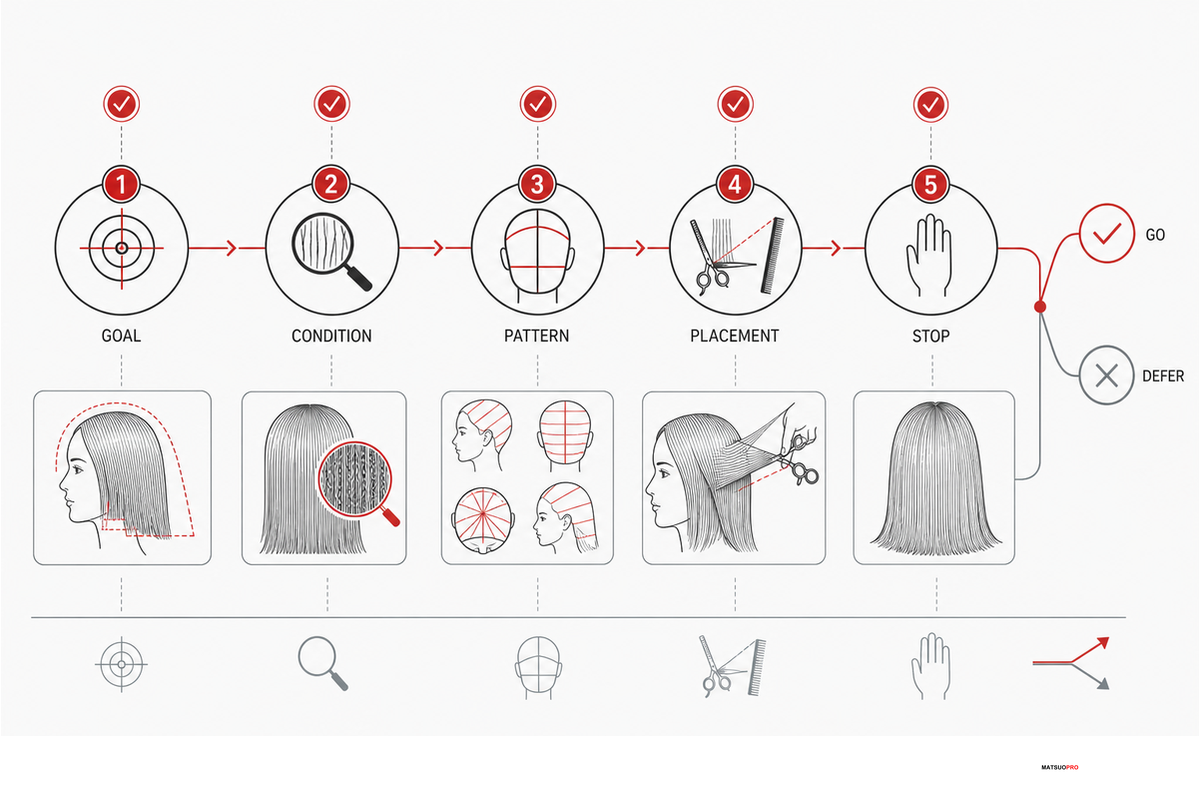
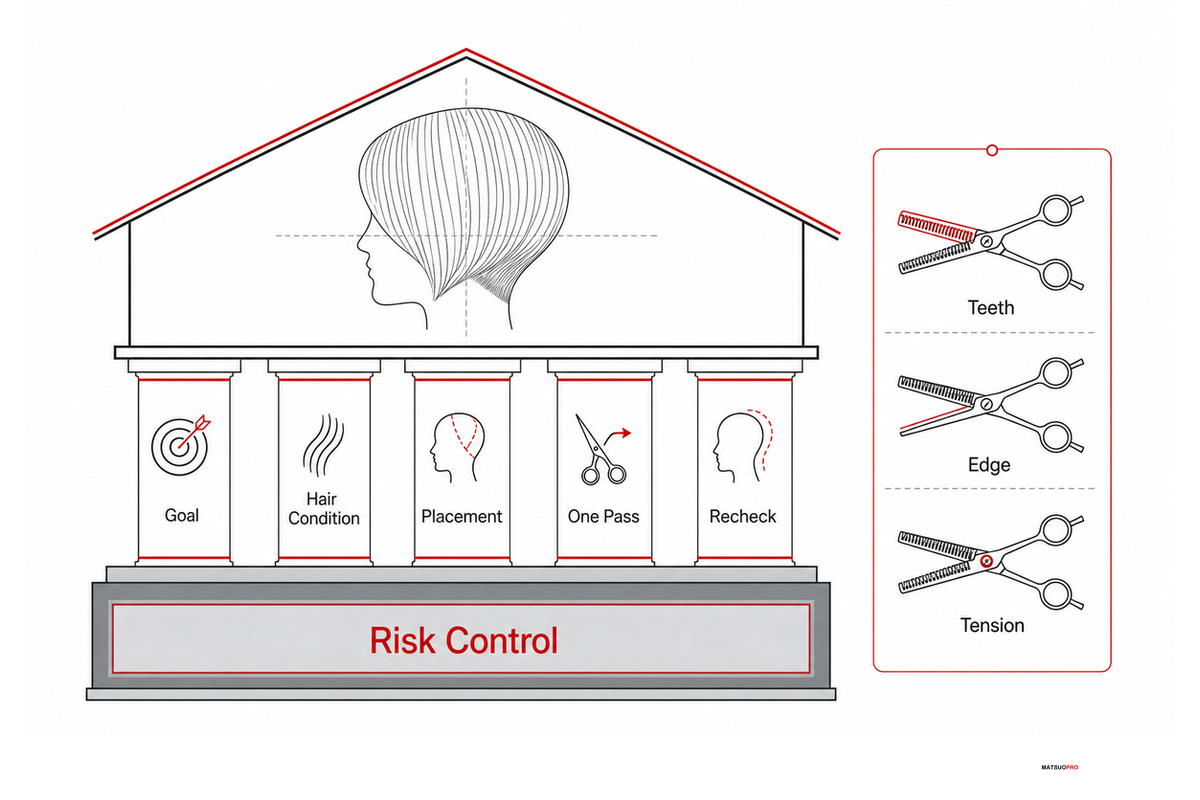
The Five-Check Thinning Decision is an editorial decision aid that screens density, strand behavior, pattern response, condition, and overall shape before the first closure. It isn’t a licensing standard. Its purpose is to turn a vague wish for “less bulk” into an observable yes, modify, or no decision.
Definition: A 5-check method for separating removable internal hair bulk from issues thinning shears can’t solve.
| Check | Ask or observe | Decision |
|---|---|---|
| Density | Is the weight genuinely concentrated inside the shape of dense hair? | Go only if internal weight is the problem and the aim is to remove bulk, not rebuild the cut. |
| Strand behavior | Do individual strands spring, collapse, resist, or show signs of hair damage? | Modify for behavior; decline if the fibre is fragile. |
| Pattern response | How much does the natural fall change from damp to dry? | Inspect in the state that reveals the finished shape. |
| Condition | Are there bleached, heat-stressed, split, or already sparse zones? | Protect or exclude compromised areas. |
| Shape | Which line, interior length, and silhouette must stay visually solid? | Mark those zones as no-thin areas. |
The approved Skills England Hairdressing Professional standard supports the logic behind this screen: consultation and analysis precede cutting decisions, and those decisions consider weight distribution, angle, balance, graduation, natural growth, and length. It lists thinning as one technique, not a required response to density.
Before you thin, state which check produced a “go” result and which visible zones remain protected.
Key takeaway: If you cannot identify the exact weight pocket and the shape that must remain, do not thin yet.
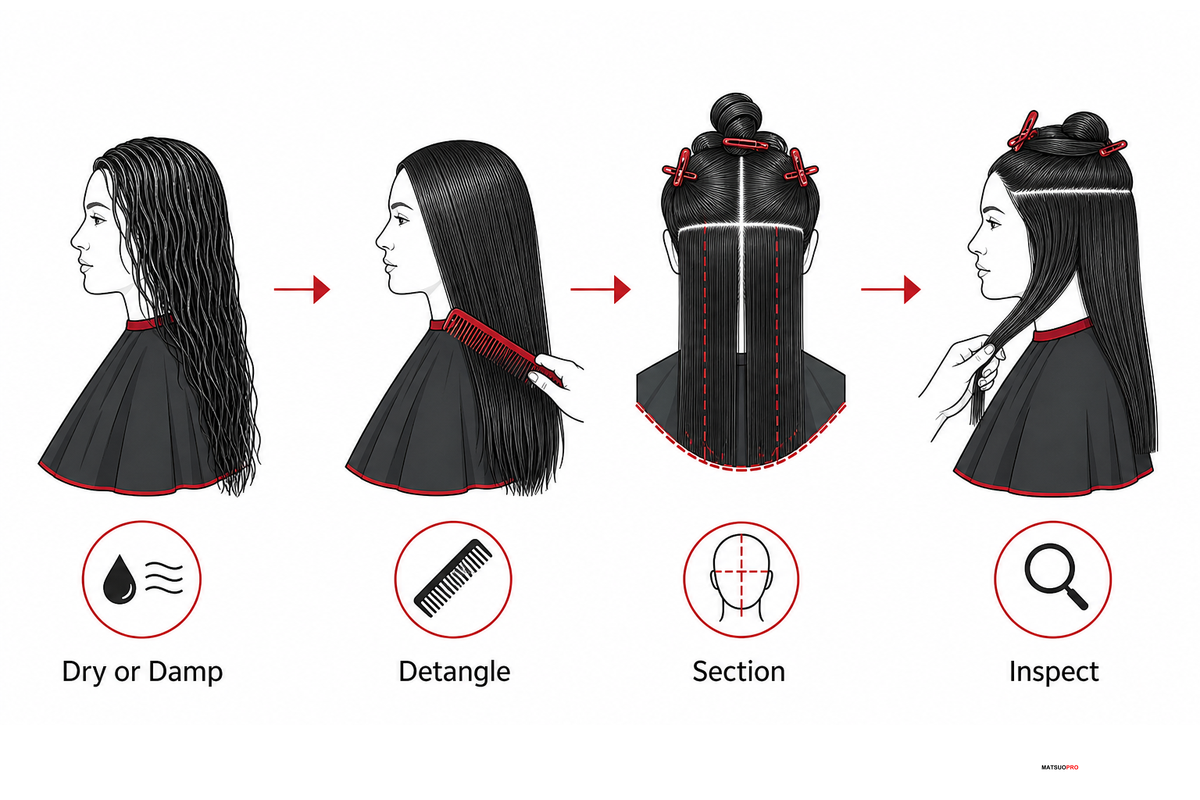
There’s no universal dry-versus-damp rule for thinning long thick hair. Dry hair usually reveals the finished expansion, movement, and flyaways more clearly; damp hair may provide cleaner section control. Choose the state that makes the risk visible for the pattern and method in front of you.
Thinning shears can be used on dry or damp hair, but the better working state is the one that reveals the finished shape and the risks for that client. Dry hair usually shows expansion, flyaways, and curl separation; damp hair can improve section control. Always release and inspect the dry fall before deciding on another pass.
Release the hair into its intended fall before isolating a section. Secure the visible top layer of hair, perimeter, fringe, and any fragile surface pieces. Keep sections of hair small enough to detangle after a single closure; a large bundle hides where short internal pieces will land.
If the working state hides the finished silhouette, don’t thin until a dry inspection makes that result visible.
Use ordinary hair cutting shears for structural lines and length. Do not grip the hair so tightly that its natural fall is distorted; inspect the ends of the hair before deciding whether a controlled finish is the remaining task.
Key takeaway: Preparation is successful when the protected zones and test section are visually obvious.
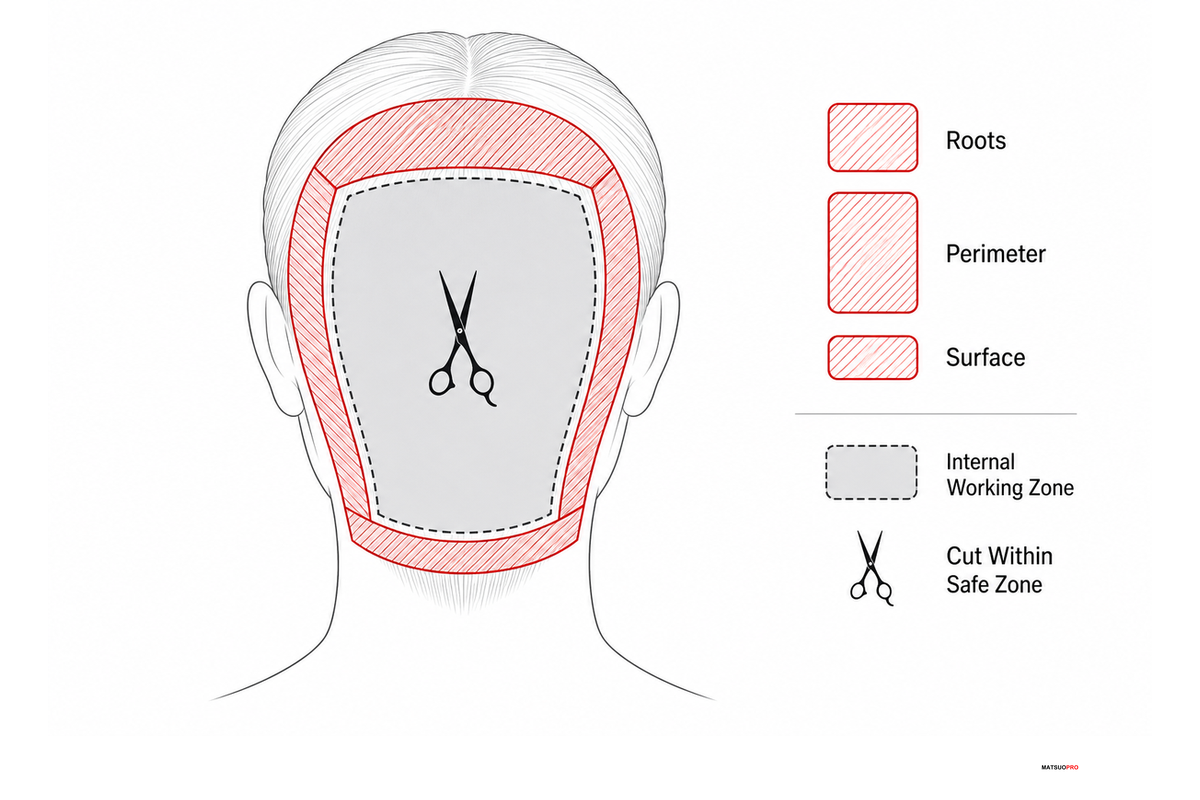
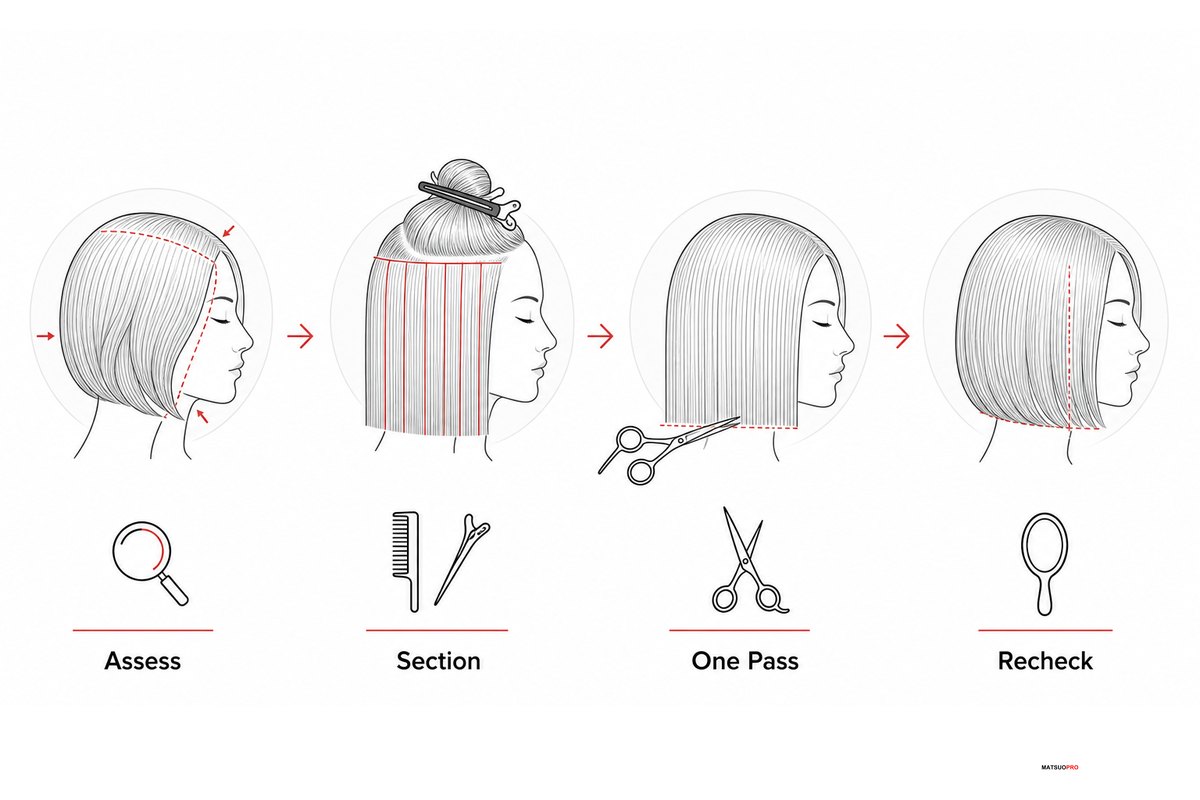
A conservative first pass uses one internal test section, one controlled closure, a complete comb-out, and a shape check before any second cut. This is a risk-control sequence, not a claim that one closure is the correct amount for every head of hair.
New York State’s cosmetology practical-exam supply list labels thinning shears optional when the candidate intends to remove excess bulk. Its 90-degree exam setup is context, not a universal angle for this guide.
For professional use, distinguish thinning and texturizing rather than forcing one tool to do every job. A texturizing shear may add texture, while thinning is particularly effective only when a test section shows that internal weight can be reduced without weakening the visible shape. Review the separate roles of texturizing shears and fine blending shears.
Key takeaway: The first pass is a test with a stop built into it, not permission to repeat the cut.
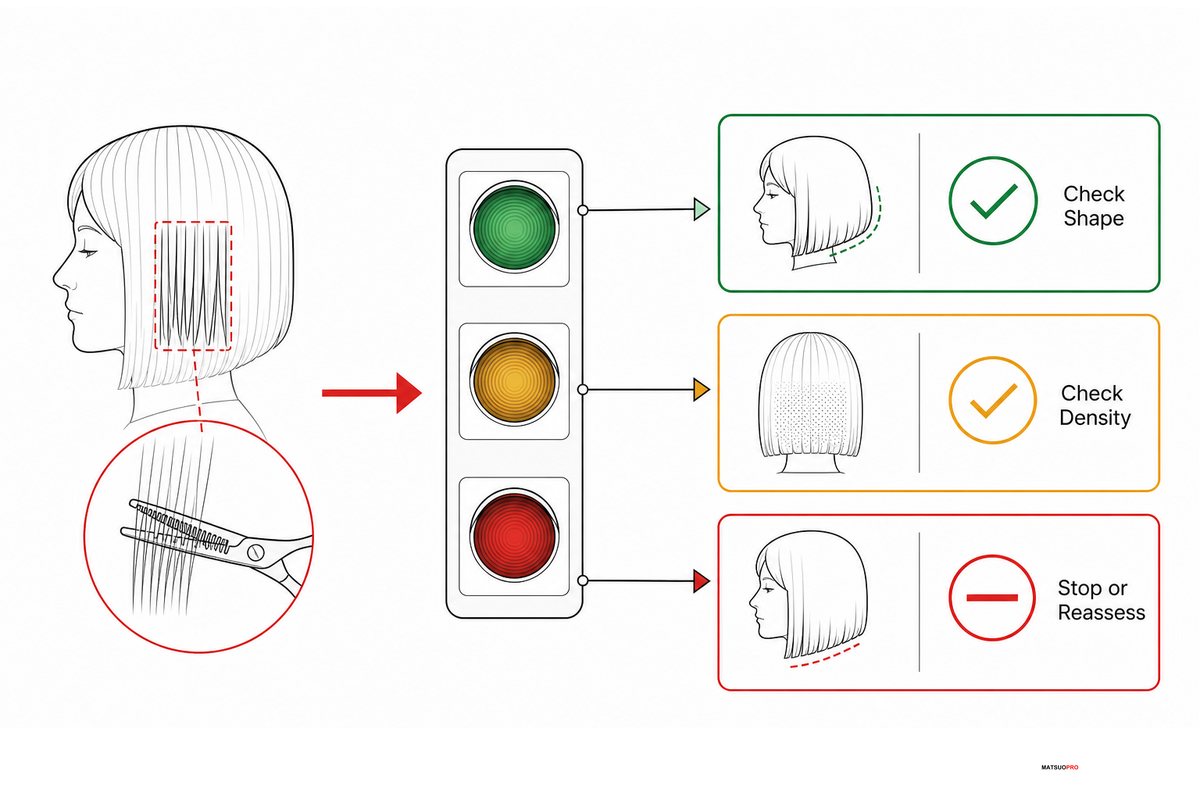
The One-Pass Stoplight converts what you can see, feel, and inspect into a green, amber, or red next action. It prevents momentum from becoming the technique. Green allows a new decision; amber changes the method; red ends thinning for that zone.
That pause to evaluate the result aligns with the Skills England Hairdressing Professional standard, which includes evaluating the completed result as part of professional practice.
Definition: A post-cut inspection that decides whether to reassess, change technique, or stop before more hair is removed.
| Signal | What you observe | Next action |
|---|---|---|
| Green | The weight pocket is reduced, the perimeter stays solid, the section settles cleanly, and the surface lies as intended. | Release all surrounding hair and make a fresh decision. Do not automatically repeat. |
| Amber | Movement improves, but flyaways appear, curl clumps loosen, or one area feels less connected. | Stop thinning that zone. Consider point cutting, internal reshaping, styling, or no further cut. |
| Red | Visible gaps, a wispy line, short pieces standing up, snagging, folded strands, or loss of the planned silhouette. | End the procedure, document what changed, and move to correction planning. |
Thinning shears don’t automatically cause hair damage, but bad placement, repeated closures, a dragging tool, or cutting compromised fibres can leave rough, short, or disconnected pieces. That cosmetic outcome is different from a clinical hair-loss disorder. Stop if the tool folds or catches strands, the surface becomes frizzy, curl groups split, or the silhouette opens unexpectedly.
Readers describe over-thinned surface pieces as “stringy,” with short pieces that stand up and curl clumps that no longer group. Curl complaints often concern lost clumping and new frizz rather than an even reduction in volume. Those reports don’t prove a universal cause, but they’re useful inspection language. If the client uses one of those words during the dry check, treat it as an amber or red signal rather than a request to blend more.
Key takeaway: Green means reassess; it never means “repeat everywhere.”
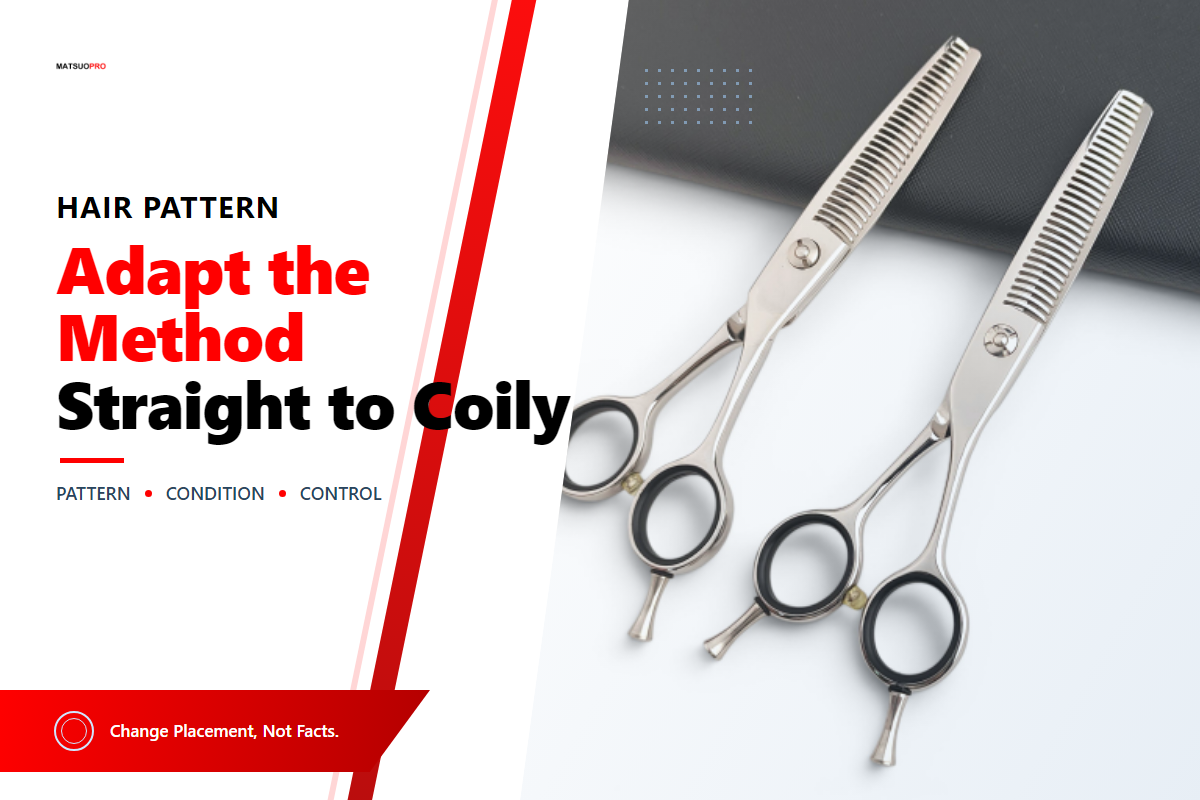
Adapt thinning to observable behaviour and condition, not to a single descriptive label. Different hair types call for the same observation-first approach: fine or thin hair, textured hair, and dense curls can each reveal a cut differently. Shrinkage, fibre curvature, surface condition, chemical history, and the intended shape determine what the cut will reveal.
Within the Skills England Hairdressing Professional standard, cutting decisions account for natural growth patterns, weight distribution, length, and the intended result; it does not prescribe one thinning method for a texture label.
A 2019 peer-reviewed review archived by the U.S. National Library of Medicine describes curly hair as a distinct fibre with physical and mechanical properties that differ from straight hair. This older mechanics evidence supports extra attention to bending, breakage vulnerability, and wet handling; it’s background, not proof of a current or fixed thinning-shear recipe by curl type.
| Hair type or condition category | Why it matters | Response |
|---|---|---|
| Straight and dense, stable natural fall | Short internal pieces and gaps can remain visible in a smooth surface. | Protect the top cover section and perimeter; test underneath. |
| Wavy, expands after drying | A damp result may understate width and flyaways. | Use a complete dry-fall check before more cutting. |
| Loose curls with variable clump size | A cut inside one curl group may open differently from the next group. | Release and compare complete curl groups before deciding on another section. |
| Coily or strongly clumped, with shrinkage | Removing internal strands can split groups or change the silhouette after release. | Inspect curl groups in their natural fall; use a small hidden test or choose another method. |
| Fine strands with high overall density | The head may feel full while individual fibres remain easy to overwork. | Protect the surface and judge the need by the internal weight pocket, not density alone. |
| Short, dense cut with visible internal pieces | There is less length available to conceal a gap or a piece that stands up. | Prefer shape correction or no thinning when a hidden test section is not possible. |
| Long, dense hair with one defined weight pocket | The excess weight may be local rather than distributed through the whole silhouette. | Limit the test to that pocket and reassess the complete dry fall before expanding the area. |
| Bleached, heat-stressed, split, or fragile | Existing weakness makes new short pieces harder to distinguish from breakage. | Exclude the affected zone or decline thinning. |
| Sparse or visibly separated surface zone | Removing more internal length can expose the scalp or widen visible separation. | Do not thin that zone; separate a cosmetic shape issue from a possible medical concern. |
Don’t thin a compromised section merely to make its surface look calmer; new short pieces can make the distinction between a cutting effect and breakage harder to read.
Key takeaway: Pattern names start the conversation; observable fibre response makes the decision.
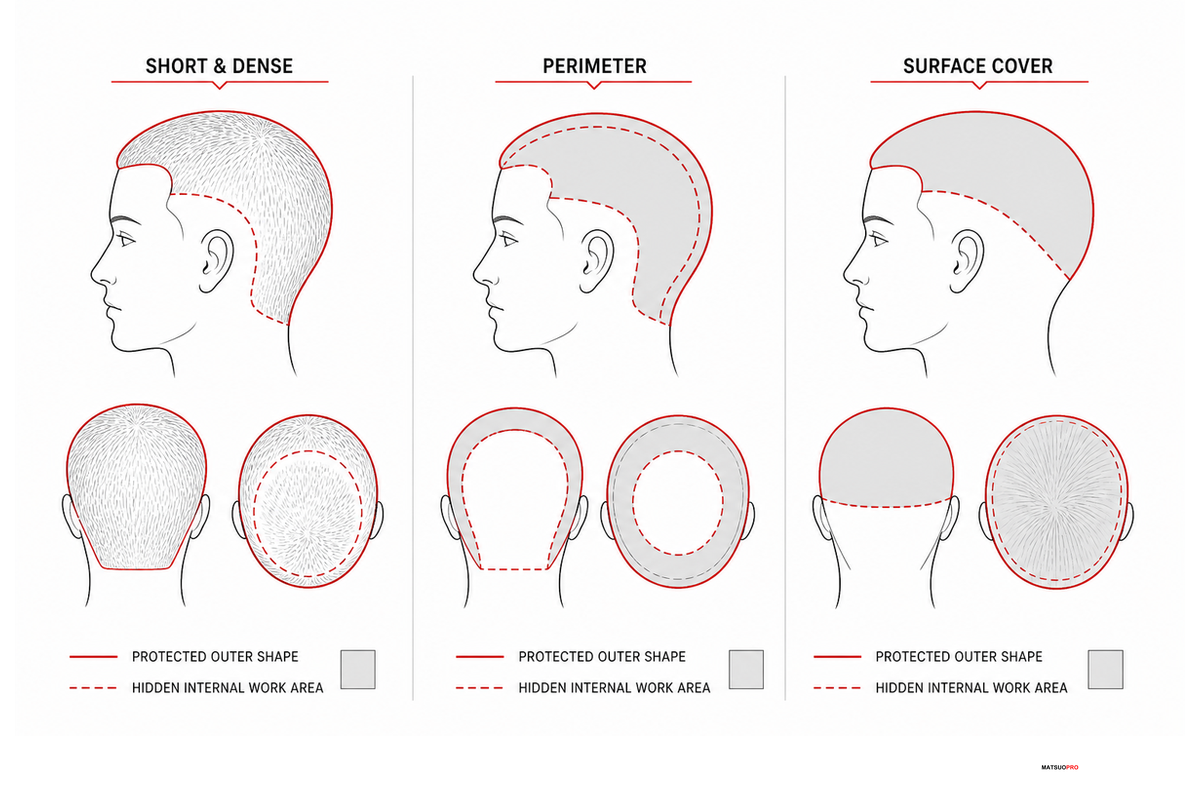
Short cuts, visible perimeters, and surface cover leave less hair available to hide an error, so use a shape-first decision rather than a fixed cutting distance. Check natural growth, weight distribution, balance, graduation, length, and the intended silhouette before deciding that thinning belongs in the plan.
Skills England’s approved occupational standard requires the finished result to be evaluated, while the New York exam source makes the tool optional. Together they support a practical rule: thinning is one possible technique, not a mandatory step in a short or dense cut.
Key takeaway: In visible zones, “no thinning” is a skilled decision, not a failure to finish.
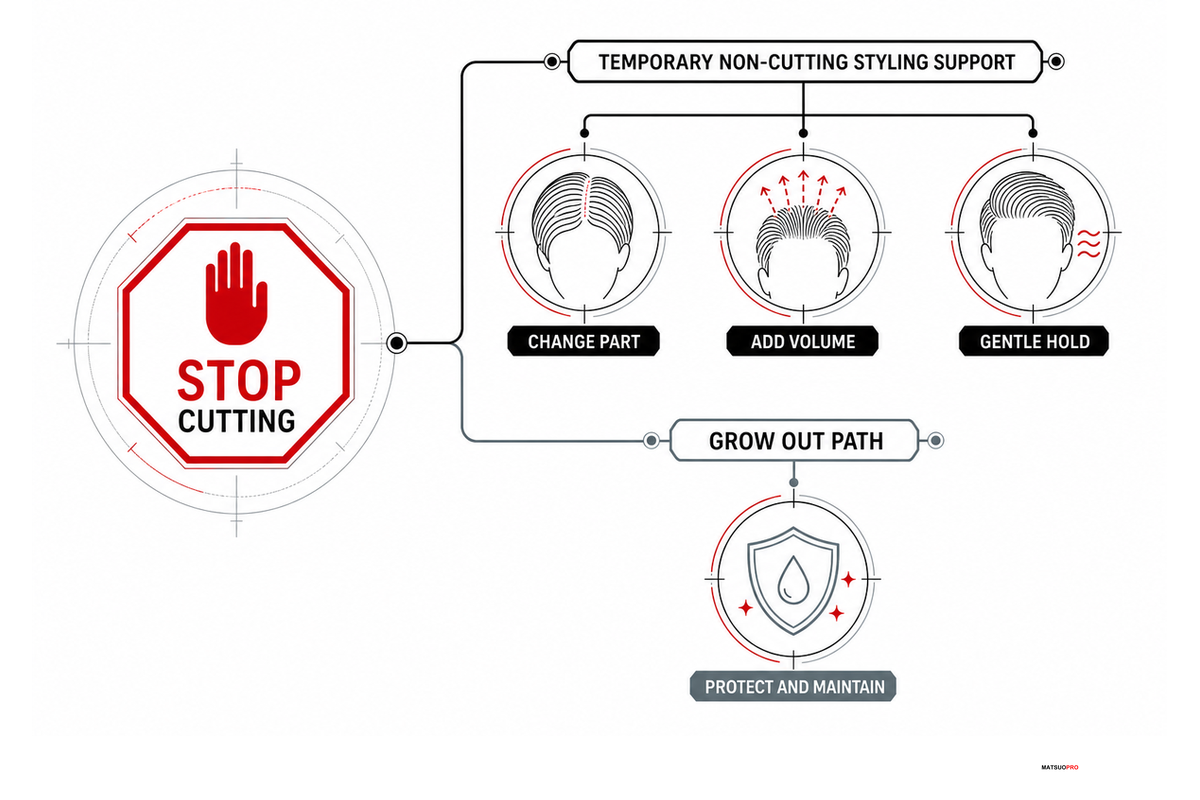
An over-thinned cut can sometimes be disguised or reshaped, but removed shaft length can’t be restored immediately. The first job is to separate a cosmetic shape problem from breakage, shedding, or scalp symptoms that need a different response.
Pause cosmetic self-correction and consult a dermatologist when a change in density is accompanied by persistent scalp pain, burning, itching, scaling or crusting, or visible hair loss at the crown or in patches. The American Academy of Dermatology describes these signs in the specific context of CCCA; this source sets a referral boundary, not a diagnosis or proof that thinning shears caused the condition.
Plain-language recovery check: Someone may say, “My hairdresser thinned out my hair—what makes my hair look uneven now?” Hair thinned in the wrong area can create harsh lines, a bad cut appearance, or an unexpected change in hair volume. Photograph the dry fall, note which pieces changed as hair grew, and take that record to a hairdresser rather than cutting a little more at home.
Definition: A three-stage plan that separates what can be addressed now, what may be feasible at the next visit, and what can improve only through grow-out.
| Horizon | Possible action | Limit |
|---|---|---|
| Now | Stop further thinning; photograph the natural fall; change the part, finish, or curl grouping to reduce visible separation. | Styling can disguise short pieces but cannot replace length. |
| Next cut | Ask a professional whether the perimeter can be strengthened or interior lengths rebalanced without shortening more than the client accepts. | One correction cannot always reconnect every internal length. |
| Grow-out | Track the shortest visible pieces and schedule reviews around shape, not a promised date. | Individual growth varies; averages are planning context only. |
An NCBI Bookshelf clinical anatomy review places average healthy hair growth near 0.35 mm per day. The table uses that single rate over 30-day planning intervals: 10.5 mm per interval and 126 mm across twelve intervals. It’s an arithmetic illustration, not a personal forecast; actual growth varies, and a cut can look unbalanced even while measured length is increasing.
| 30-day intervals | Arithmetic length at 0.35 mm/day | How to use it |
|---|---|---|
| 1 | 10.5 mm | Photograph the same natural fall; do not judge from styling alone. |
| 2 | 21.0 mm | Compare the shortest visible pieces, not total density. |
| 3 | 31.5 mm | Ask whether a light perimeter adjustment would help. |
| 4 | 42.0 mm | Reassess connection between internal pieces and lengths. |
| 5 | 52.5 mm | Keep further thinning out of the recovery zone. |
| 6 | 63.0 mm | Review the silhouette; the average still is not a deadline. |
| 7 | 73.5 mm | Compare shape movement with the original photographs. |
| 8 | 84.0 mm | Decide whether a structural cut now reconnects the interior pieces. |
| 9 | 94.5 mm | Keep the plan based on measured pieces and client preference. |
| 10 | 105.0 mm | Avoid assuming that every zone grew at the average. |
| 11 | 115.5 mm | Check whether the visible problem has already resolved. |
| 12 | 126.0 mm | Use the full comparison as context, never a guarantee. |
A client returns with a full scalp of hair but a thin-looking crown because short internal pieces now lift through the top cover. There’s no scalp discomfort, patchy loss, or new shedding. The professional stops cutting, photographs the dry fall, changes the finish to reduce separation, and plans a later perimeter adjustment. That’s a cosmetic recovery path. If the same client reported burning and visible crown loss, the correct next step would be medical assessment, not another cutting service.
The American Academy of Dermatology distinguishes shedding from hair loss. The NCBI Bookshelf review reports an average near half an inch per month, but individual timing varies, so six inches per year isn’t a correction promise.
The phrase thin hair can describe a visual result, low density, breakage, shedding, or hair loss. That ambiguity is why the recovery plan begins with observation rather than a new cut.
Key takeaway: Correct the shape you can see, protect the scalp questions you cannot diagnose, and let time replace removed length.
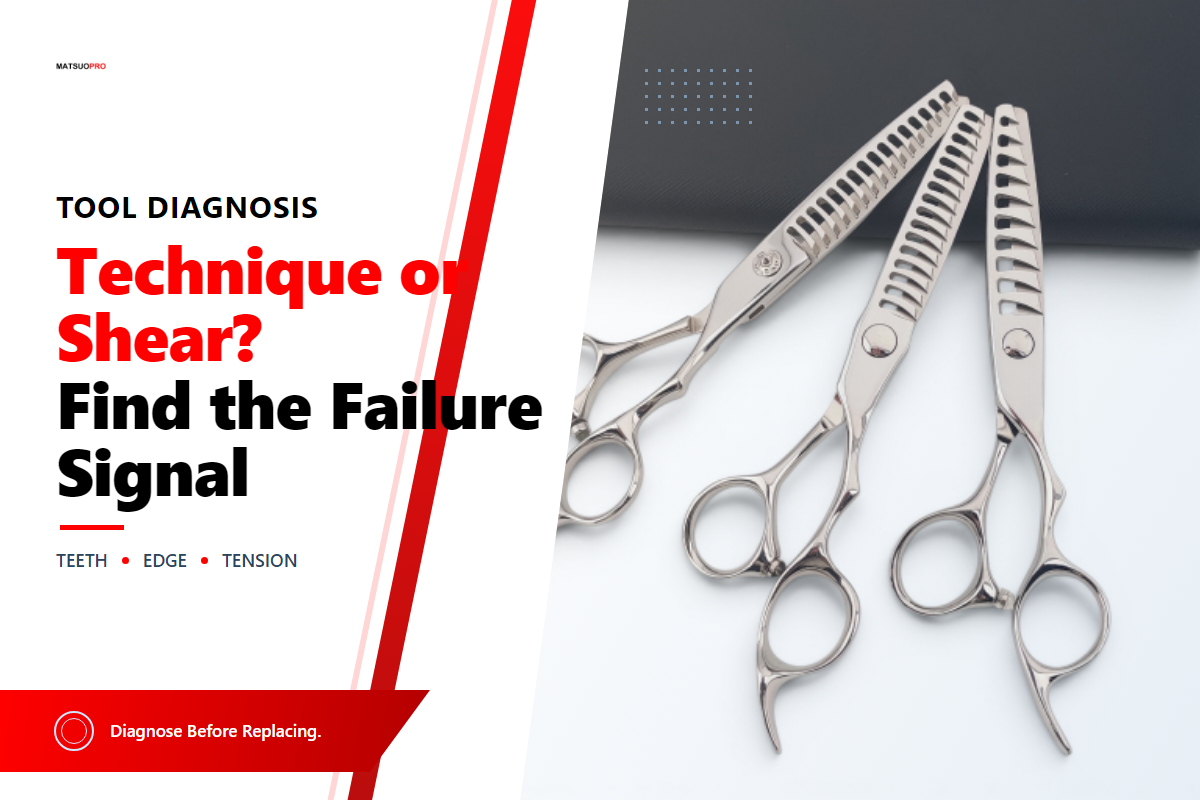
Dragging, folded strands, rough closure, or slipping hair are reasons to inspect the shear before removing more weight. Shears help only when their cutting action remains consistent; extra hand pressure isn’t a repair. Clean the tool, check its tension according to the maker’s instructions, and stop if the cutting feel remains inconsistent.
| Symptom | Possible issue | Next action |
|---|---|---|
| Jerky or heavy closure | Excessive tension, contamination, damage, or alignment trouble | Clean, oil, verify tension, then stop for service if unresolved. |
| Hair slips or pushes | Low tension, edge condition, or mismatch between tool and task | Do not compensate with repeated closures. |
| One tooth catches | Tooth damage or alignment problem | Remove the tool from service and use a specialist technician. |
JAGUAR’s manufacturer care guidance links jerky movement with excessive tension and slipping hair with low tension, then recommends professional service when cleaning, oiling, and tension correction don’t restore clean cutting.
Tool feel matters: a jerky closure or slipping section is a reason to inspect the shear, not to squeeze harder or make another pass.
MATSUOPRO reports that its facility covers more than 2,000 m² and produces premium shears through more than 80 steps, including vacuum and cryogenic heat treatment, CNC cutting, hand honing, hand tensioning, and piece-by-piece inspection. That reported craftsmanship is a construction and quality-control fact supplied by the manufacturer; it does not guarantee a styling outcome on every head of hair.
When the tool itself needs reconsideration, compare professional thinning shears for thick hair on the dedicated commercial page. Its job is product selection; this guide doesn’t duplicate its tooth-count matrix, cut-rate tools, steel comparisons, or quotation workflow.
Key takeaway: If cutting feel changes, stop diagnosing the hair and inspect the instrument.
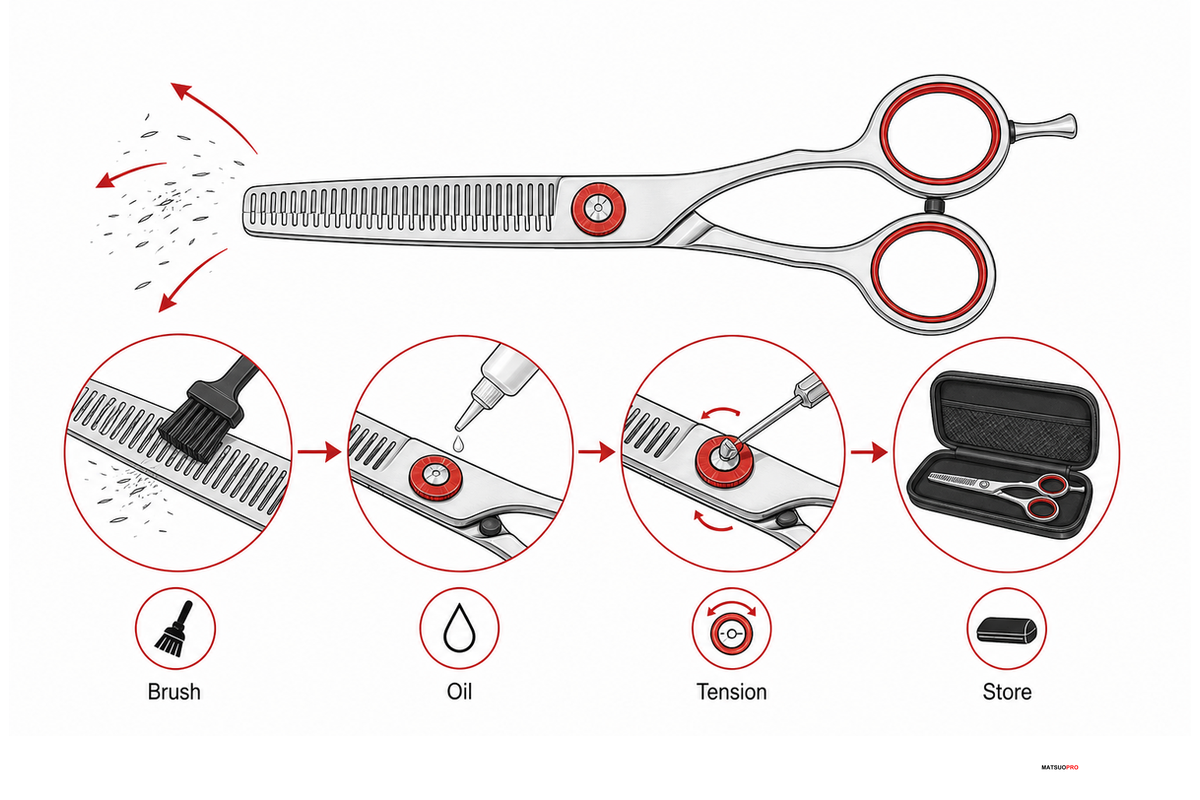
Separate performance care from client-to-client sanitation. Cleaning, lubrication, tension checks, storage, and specialist sharpening protect cutting feel; disinfection is a legal and infection-control obligation governed by local rules and the disinfectant label.
California’s current rule describes debris removal, soap-or-detergent cleaning, and use of an EPA-registered disinfectant for shears. New Mexico’s rule explicitly names thinning shears/texturizers and requires label contact time. These are state examples, not one national procedure.
For steel terminology and hardness context, use the professional shear steel guide and the separate explanation of HRC hardness in hair shears. Neither hardness nor steel name replaces correct tension, cleaning, or specialist service.
Key takeaway: Maintain the cut, meet the local sanitation rule, and never use a calendar as the sole sharpening diagnosis.
Useful thick-hair education should answer “when should I stop?” before presenting another product choice. Live search questions repeatedly ask about damage, contraindications, wet versus dry use, and grow-out. That demand pattern is why this article gives inspection and recovery their own frameworks.
DataForSEO’s available U.S. series covers July through December 2025, not a full year-over-year comparison. The damage-question cluster moved from 90 searches in July to 210 in August, 170 in September, 110 in October, 70 in November, and 90 in December. That variation shows recurring interest, not a permanent growth trend or a forecast.
An Indiana rulemaking notice posted July 16, 2025 also shows why professionals should check current local requirements rather than rely on an old care checklist; it was a state proposal covering broad education, practice, sanitation, and facility topics, not a national thinning-shear rule.
Action for 2026: keep a written test-section and stop-signal routine, review the board rules where you practice, and treat six-month search data as editorial context only.
Key takeaway: The responsible change is better risk communication, not a claim that the market has suddenly adopted a new universal method.
These answers use a decision framework consistent with the Skills England Hairdressing Professional standard: consider weight distribution, balance, natural growth, length, and the evaluated result rather than treating density as a stand-alone instruction.
It can be, but density alone is not enough to decide. Check where the unwanted weight sits, how the strands and pattern behave, whether the hair is compromised, and which visible lines must remain. Use a hidden test section only after the intended shape is established, then release and inspect before considering another cut. If you cannot name both the weight pocket and the protected silhouette, choose another technique or postpone the decision.
Neither state is universally safer. Dry hair reveals natural fall, expansion, curl grouping, and flyaways; damp hair can make sectioning easier. Choose the state that exposes the main risk, then inspect the finished shape in its natural dry fall before removing more weight. The method should follow the hair’s observable response rather than a blanket wet-or-dry rule.
The cut strands continue to grow, but the removed length cannot be restored immediately. Styling may disguise shorter pieces, and a later trim may strengthen the perimeter or rebalance interior lengths. Avoid repeated thinning during recovery and track the shortest visible pieces instead of relying on a promised date. If a change in density includes persistent scalp symptoms or visible crown or patchy hair loss, seek medical assessment.
Avoid them on fragile, highly compromised, already sparse, or shape-sensitive hair. Stop if the shear drags or the silhouette weakens.
Do not rely on a calendar alone. Service need depends on client volume, cleaning, lubrication, storage, drops, tension, edge condition, and tooth alignment. First remove debris, clean and lubricate the pivot, then check tension according to the maker’s instructions. Folding, pushing, snagging, rough closure, a damaged tooth, or a sudden need for extra pressure can justify service. Stop using the shear if one tooth catches or strands fold instead of cutting. Use a technician familiar with thinning teeth and blade geometry; household-scissor or knife sharpening can change the tooth profile, alignment, or relationship between the cutting blade and toothed blade.
Key takeaway: A reliable answer names the condition that changes the recommendation.
Product-selection questions belong on the dedicated commercial page. This guide covers judgment, technique, stopping, recovery, and care. Questions about ergonomics, an ergonomic design, T-shape teeth, adjustable tension, a 6 inch format, one blade versus two, or claims such as razor-sharp, ultra sharp, super sharp, and sharp blades belong there, not as technique proof here.
This article is an educational decision guide, not a substitute for an in-person styling assessment, local licensing rules, disinfectant instructions, or medical diagnosis. Technique claims use reviewed independent sources or qualified language. The MATSUOPRO manufacturing description is first-party information supplied by the company and isn’t presented as proof of a styling result.
MATSUOPRO is the Mackay Hair Scissors manufacturing brand for professional hairdressing shears, barber scissors, thinning shears, and pet-grooming scissors. We support salons, distributors, academies, grooming brands, and private-label buyers that need factory-direct production with practical material guidance.
Our buying guides are written to help purchasers compare steel grades, handle styles, blade geometry, surface finishes, logo options, packaging, MOQ, and sample validation before placing an OEM or wholesale order. The goal is to make each scissors specification easier to discuss with a real production team.
Factory-direct supply since 2014, with product lines covering professional cutting shears, barber shears, thinning scissors, texturizing scissors, left-handed models, and pet grooming scissors for international B2B customers.
We focus on Japanese 440C, VG10, and ATS-314 steel choices, convex and bevel edge geometry, ergonomic handle balance, tension systems, logo engraving, private-label packaging, and sample-based OEM confirmation.