Get in Touch with Mackayhairscissors Company
We use submitted details to respond to your quote request. Read our Privacy Policy.

Updated August 2026 Hairstylist, Barber, & Salon Buyer Educational Resource Guide
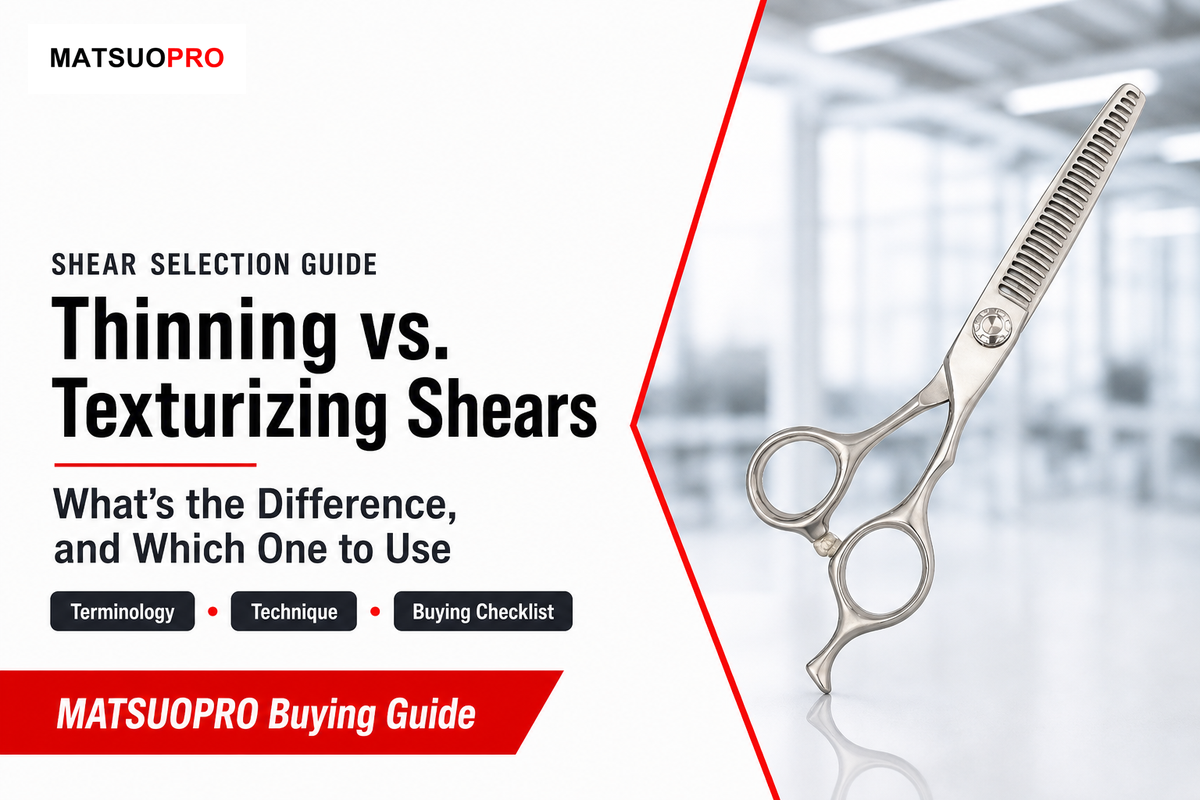
Thinning & Texturizing Shears are both toothed hair-cutting tools, but they’re built to do different jobs: a thinning shear’s closely spaced teeth remove weight in small, even amounts, while a texturizing shear’s wider-spaced teeth remove hair in larger, more visible sections to create movement. Confusing the two — or assuming tooth count alone tells you which is which — is one of the most common reasons a haircut ends up with visible lines, wispy sections, or a result nobody asked for.
| Category | Typical tooth count | Primary job |
|---|---|---|
| Chunking | 5-10 teeth | Aggressive de-bulking on very thick, coarse hair |
| Texturizing | 14-25 teeth | Visible movement, separation, deliberate texture |
| Thinning / blending | 28-46 teeth | Softening blunt lines, invisible weight removal |
Tooth-count bands per manufacturer product-line data published across MATSUOPRO’s own thinning and texturizing shear specification pages.
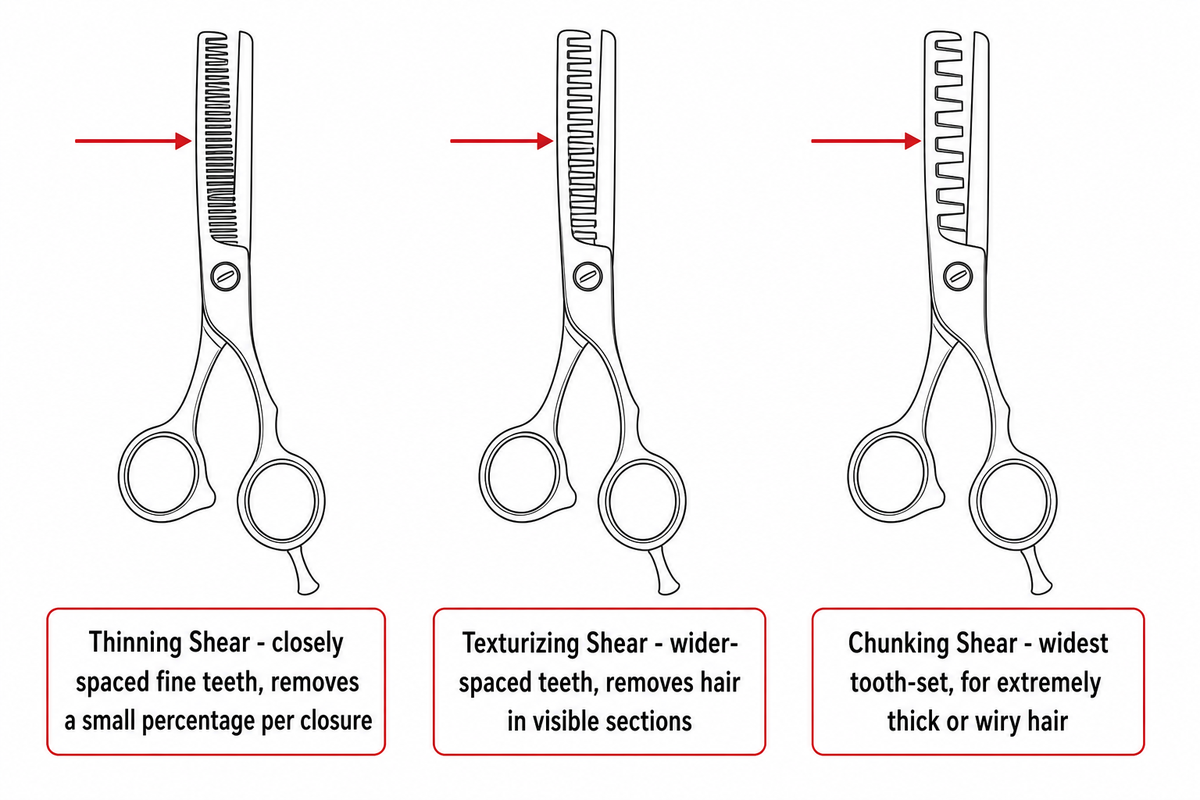
Whereas thinning shears consist of many small, fine, tightly-set teeth that clip off an even percentage of hair with each pass, allowing it to become invisibly integrated into a haircut, texturizing shears use far fewer widely separated teeth to shear off a larger, noticeably disparate amount of hair which adds deliberate texture and movement to layers.
However, it’s an easy distinction to miss, with both shears featuring the characteristic look of one straight blade paired with one toothed blade — but one cuts in such a way as to be concealed, the other cuts in such a way as to be seen. There’s a third, even more extreme form of toothed cutting: chunking shears, characterized by the widest tooth-set, for use when rapidly cutting down the volume of extremely thick or wiry hair. Several product lines and industry write-ups treat chunking, texture, and thinning shears as three parts of one tool continuum rather than three unrelated tools — which matches what a formal cosmetology curriculum teaches: Citrus College’s COS 184 haircutting course outline lists shears, razor, clippers, and texturizing shears as the primary haircutting tool set, alongside a separate curriculum section covering notch, slide-cut, point-cut, and effilating/slithering technique.
Depending on brand, size, model, and manufacturer, the differences get named differently, with subtle variation in nuance but a fundamentally consistent mechanic: with a thinning shear, the very short hairs fall through to hide among the remaining long lengths of hair, so if the cut lengths don’t look too different from the lengths surrounding them, the result reads as “invisible.” Wide-spaced teeth, as on a texturizing shear, simply pick out and snip off larger strands of hair, which is what results in visible volume and the appearance of moving layers rather than plain de-bulking. No matter which name a brand puts on these toothed haircutting implements — “texturizing shears,” “texture shears,” or “thinning scissors” — tooth spacing is the factor that actually matters.
These two categories aren’t always described as opposites in casual conversation — a client or a newer stylist might use “thinning” and “texturizing” almost interchangeably, and shears and scissors get used as loose synonyms industry-wide. That looseness is exactly why a direct thinning shears vs texturizing shears comparison matters, and why a client’s “hair scissors” or the ends of the hair they point to during consultation don’t tell you which type of scissors the result actually needs: the tools solve different problems even when the vocabulary around them blurs together.
Texturizing shears are toothed cutting tools with 14-25 wider-spaced teeth designed to remove hair in visible, deliberate sections rather than blend invisibly — the goal is movement and separation, not disappearance. Stylists reach for them to break up flat, heavy-looking layers or to add piece-y definition to the ends, rather than to reduce overall bulk the way a thinning shear does.
Thinning scissors are toothed shears with 28-46 closely spaced fine teeth that remove only a small percentage of hair per closure, so the cut stays smooth and unchanged in overall shape and the removal reads as invisible. Some product lines market a narrower, higher-tooth-count slice separately as “blending shears” — the underlying mechanic is still the same fine-tooth, invisible-removal category as thinning, just at the high end of the tooth-count spectrum.
It’s tempting to assume that fewer teeth always means a more aggressive, “stronger” cut. One independent Japanese manufacturer’s own published specs for thinning shears refute that premise, independently cross-checked against a second, separately published source for the same product line: a 30-tooth shear is listed at a 15% cut ratio while a 40-tooth shear in the same line is listed at 35% — more hair per pass, not less! Tooth count is one input; tooth width, spacing, groove shape, and the cutting blade’s geometry change the result just as much, and none of those show up in a simple teeth number.
This means: don’t buy, teach, or assess a result by tooth count alone. Ask what percentage of hair a specific model is rated to remove, and confirm it against the maker’s own published data for that exact model — not a generic “more teeth = gentler” rule of thumb.
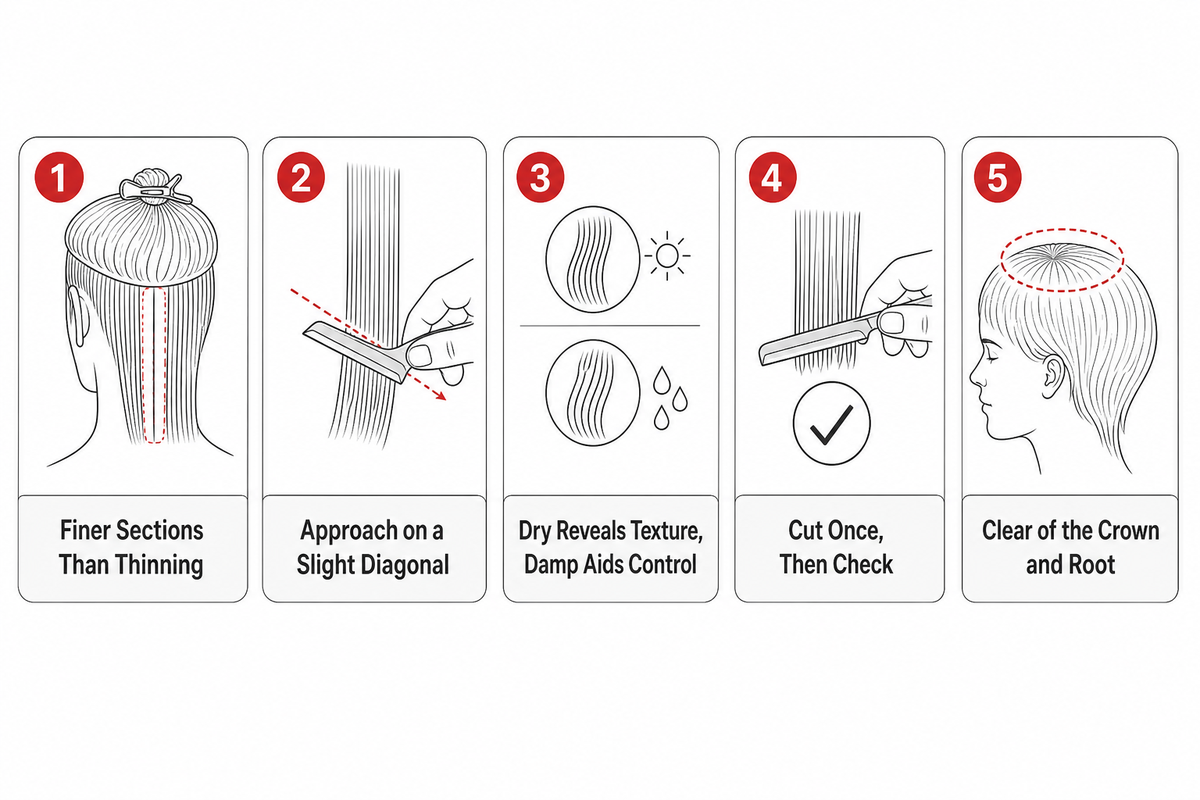
For effective texturizing, work on dry or slightly damp hair, section in small portions, cut at approximately 45 degrees into the ends, and check the result after every section before moving to the next. This is the technique most guides skip past quickly — most existing coverage of these tools spends far more time explaining thinning than texturizing, even though the two require different handling, and the UK’s own Advanced and Creative Hair Professional occupational standard lists advanced texturizing as its own distinct technique alongside thinning.
Because a texturizing shear is designed to create texture in the hair and not just to thin out the hair, you can expect it to behave a little differently across sections. On shorter hair, a light pass at the ends usually is effective, while on longer hair, the stylist may need to move through multiple sections to create separated, textured hair through the length rather than focusing on one area. The resulting shear movement should always appear intentional and deliberate rather than accidental; these shears are made to produce visible separation rather than conceal the removal of the weight. This difference becomes obvious in the way they behave.
You might consider using the shears when finishing a shag style applied to medium-density hair, if you want visible, piece-y separation through the mid-shafts without disturbing the outline. Working on clean, dry hair with the shears held at a 45-degree angle and taking half-inch sections through only the interior — avoiding the perimeter and the crown — two light passes are enough to appear purposeful, not destructive. A third pass on the same section would very likely tip into visible over-texturizing; the stylist stops and reassesses on a fresh section instead of repeating the same spot.
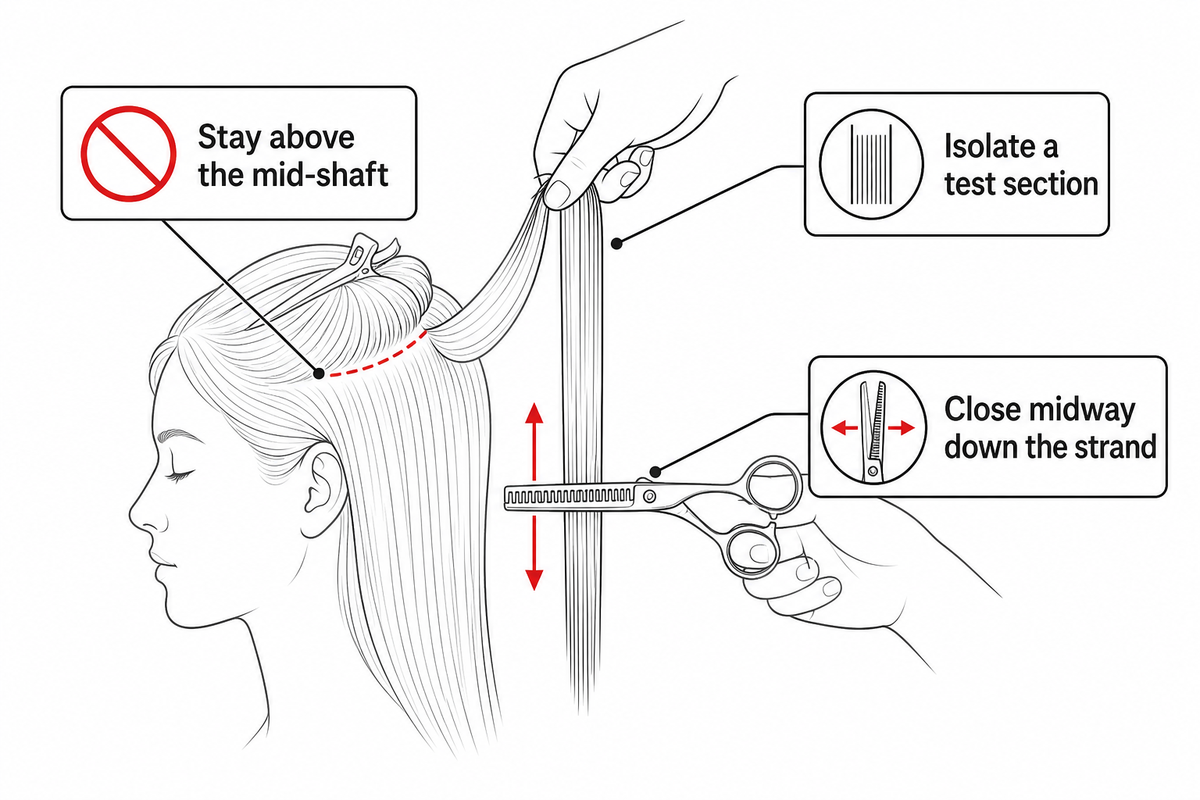
To thin correctly, work on completely dry hair, isolate a test section away from the edge of the head, close the shear about midway down the strand, then release and inspect before deciding on a second closure. This is baseline technique for general thinning — if you’re specifically working on very thick or dense hair, the safety and stop-signal considerations run deeper than what’s covered here.
Work on dry hair when thinning, because it shows the finished fall, flyaways, and curl expansion immediately; damp hair hides how much you have actually removed until it dries. For texturizing, either dry or slightly damp can work depending on whether section control or finished-result visibility matters more for that particular head of hair; there is no single universally correct state for either tool.
Section conservatively, three-inch sections or smaller, and keep the shear roughly perpendicular to the strand rather than angled — the opposite orientation from texturizing technique. Stay above the mid-shaft: thinning applied within an inch or two of the scalp is one of the most common causes of short hairs standing up as the cut grows out.
Thinning out hair is a gradual process, not a one-pass fix — release and check after every section rather than assuming more closures always mean better results. On very heavy hair, it can take several light passes across different sections to remove excess weight from hair without leaving harsh lines; on already-thin hair, even one aggressive pass can go too far. The amount of hair removed depends on tooth count, section size, and how close to the root the shear works, not on how many times the blade closes — thinning the hair well is about precision in each closure, not repetition.
In curly or coily hair, the risks of using thinning shears are even greater: while the hair is wet or freshly cut, shrinkage obscures what was actually removed — look at the dry, released fall before confirming there needs to be a second cutting, and test with far less hair than on straight hair. For the full density-specific safety framework — including a five-check decision method and recovery guidance if a section comes out over-thinned — see the safe-use guide for thinning shears on thick hair.
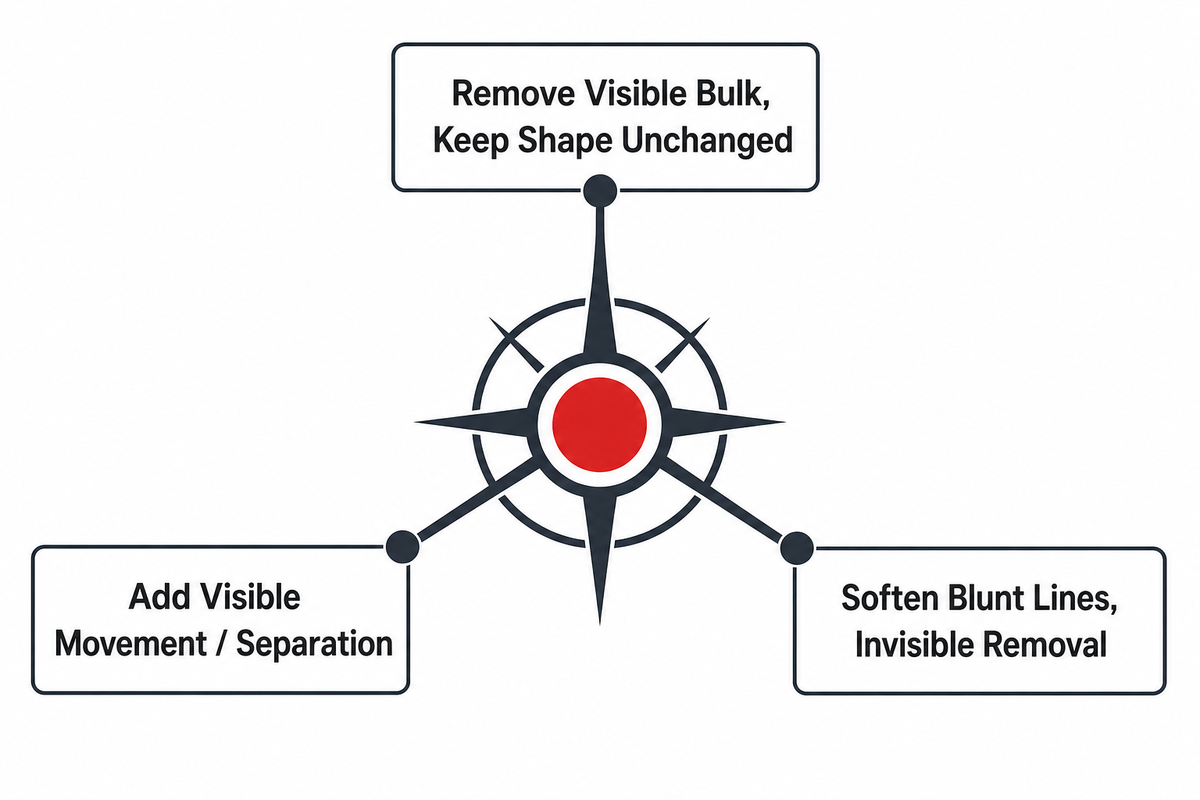
Work by the desired result — not just the hair type: removing weight invisibly is thinning, adding movement and separation is texturizing, and doing both without compounding the removal is thinning one section, then texturizing a different one. The table below illustrates common chair problems.
A few stylists might carry both thinning and texturizing scissors in their kit, and pull out whichever the section calls for rather than committing to one type for the whole cut. Thinning techniques and texturizing hair aren’t competing skills — shears can be used together across one haircut as long as they’re never applied to the exact same strands twice. New hires sometimes ask whether they even need both, or whether scissors are used interchangeably in practice; that only holds true within a narrow middle band of medium hair, and outside that band the wrong choice shows.
| Situation type | Reach for | Why | Limitations / not suitable for |
|---|---|---|---|
| Remove visible bulk, keep shape unchanged | Thinning (28-46 tooth) | Many close teeth blend the removal invisibly into the existing shape | Not for adding visible texture — won’t create separation |
| Add visible movement/separation to an already-shaped cut | Texturizing (14-25 tooth) | Wider teeth remove larger, more visible sections | Not for bulk reduction on very thick hair alone — pairs poorly as a first move on dense sections |
| Very thick/coarse hair needing fast de-bulking | Chunking (5-10 tooth), then finish with thinning | Widest teeth remove the most volume per pass; thinning smooths the transition afterward | Not suitable as a finishing tool on its own — leaves visible chop marks if used alone |
| Need both bulk reduction and visible texture | Thin first, texturize a separate section second | Sequencing prevents compounding two aggressive removals on the same strands | Never run both tools on the exact same section back-to-back |
| Fine or fragile hair | Neither, or a high-tooth-count finisher only, very light pass | Wide-tooth removal on fine hair tends to leave visible holes or wispy ends | Avoid low-tooth-count texturizing/chunking entirely on fine hair |
| Curly or coily hair | Thinning, extra caution, dry inspection | Shrinkage while wet hides the true amount removed | Don’t judge the result until hair is released in its natural dry state |
| Blending a fade or scissor-over-comb work | Thinning, small sections | Fine teeth fine-tune the line left by clippers or straight shears | Not a substitute for the clipper work itself |
| Textured bangs or piece-y fringe | Texturizing, ends only | Removes enough at the tips to break up a blunt line without shortening overall length | Avoid full-length passes — confine to the outer inch or two |
| Client specifically distrusts “thinning shears” by name | Either tool, reframed by result | Describing the intended visible outcome (softer vs. more textured) matters more to most clients than the tool name | Doesn’t change the technique — only the consultation language |
Once you’ve identified which job — thinning vs texturizing — needs doing, don’t second-guess yourself mid-section: these tools are built for a particular kind of weight removal, and once it’s done, switching to the other tool on that same strand rarely improves the result. A texturizing shears vs thinning shears swap mid-section is one of the more common ways a clean result turns choppy — use these shears deliberately, one at a time per strand, and that mistake mostly disappears. Fine or thinner hair is the one exception worth a second look before committing, since both categories carry more risk there than on medium or thick hair.
Thinning shears remove excess weight from hair one closure at a time, and weight from the hair, once cut, doesn’t come back until it grows out — so cutting hair with either tool rewards a conservative first pass over an aggressive one. That same logic holds for layered cuts generally: reaching for a second tool to “fix” a result can remove more excess bulk than the original mistake did. For the full tooth-count breakdown across all four categories — chunking, texturizing, thinning, and the high-tooth-count blending slice — with a granular removal-rate matrix, see the full tooth-count comparison across all four shear types.
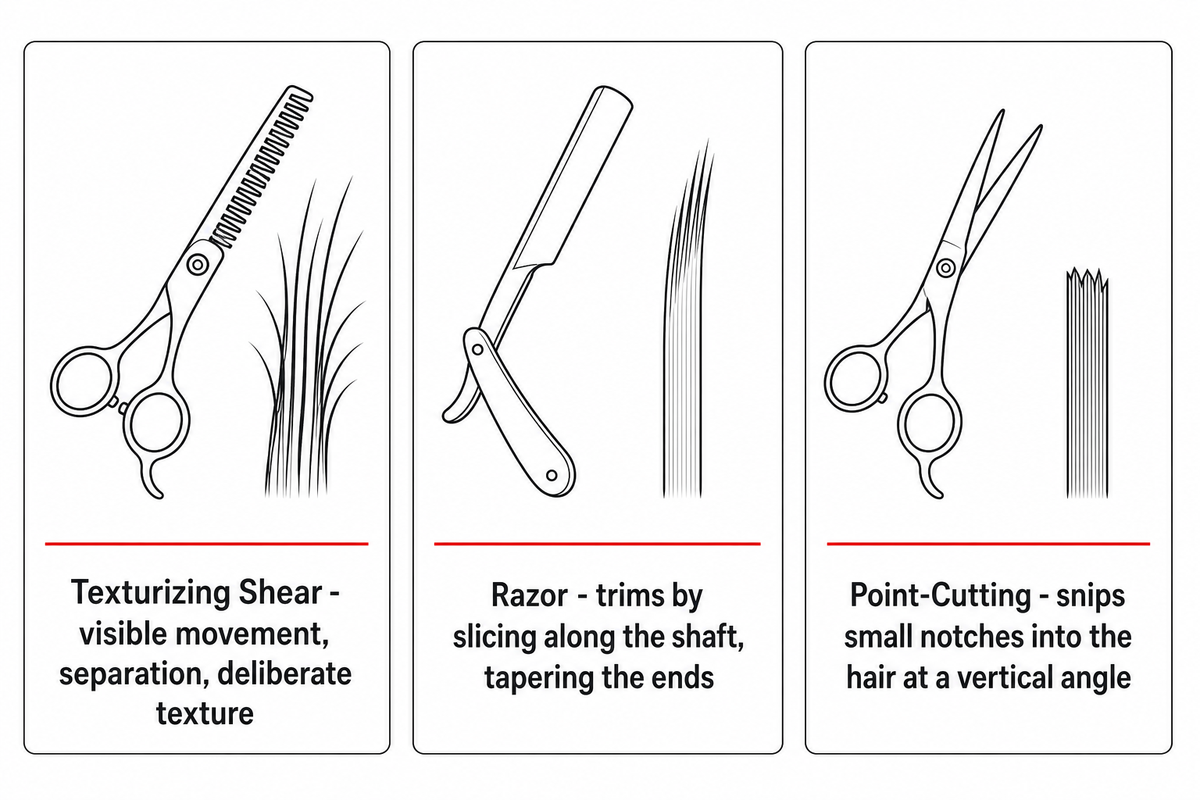
Razor thinning and point cutting with regular shears are different tools, not alternatives to thinning or texturizing shears — they address the same problem by a different method, with a different set of possible issues. While researching “thinning vs. texturizing” a stylist may come across these two and assume they’re interchangeable; they aren’t.
Point-cutting is taught as its own distinct technique in formal cosmetology curricula — see Citrus College’s COS 184 course outline, which lists notch, slide-cut, point-cut, and effilating/slithering separately from shear-based thinning and texturizing.
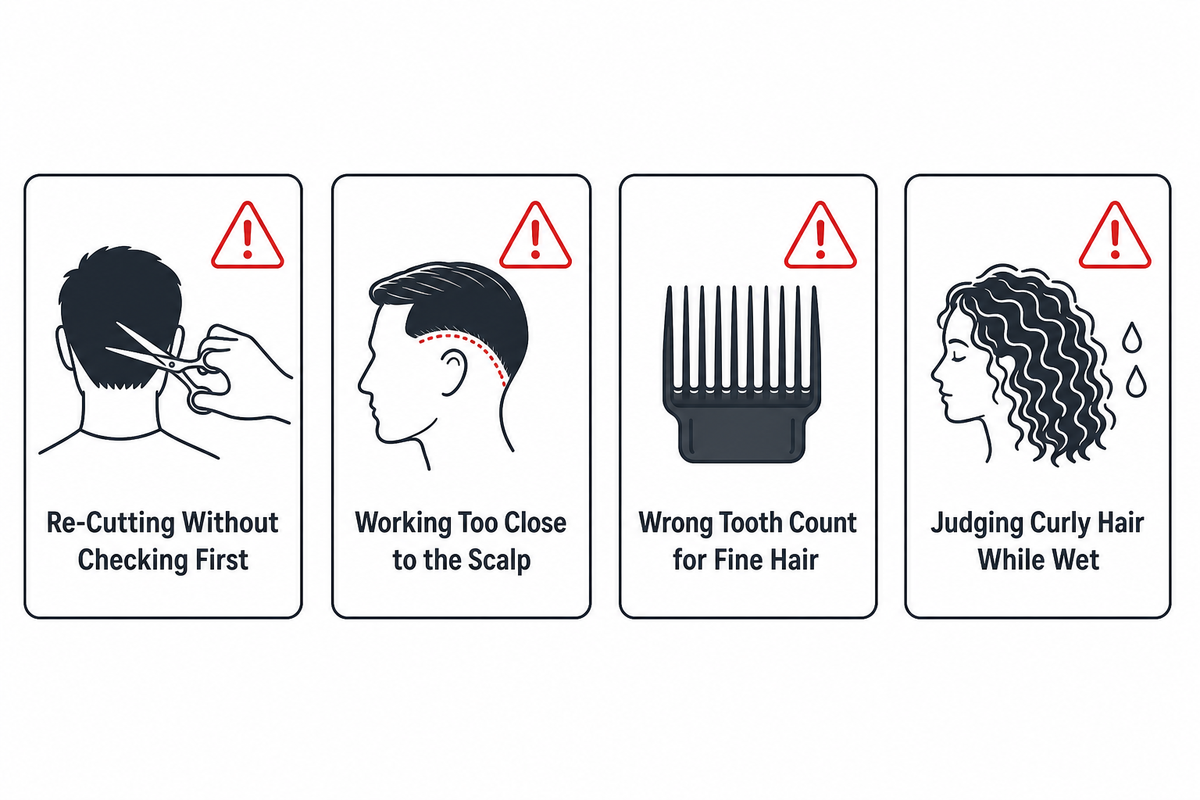
It’s typical of novice stylists to choose whichever shear is closest at the beginning of the haircut rather than deciding in advance what the best outcome for the hair is. New stylists should reach for texturizing shears for styles in which it’s important that the cut texture be clearly visible; reach for thinning scissors if the client’s goal is the invisible removal of bulk. Most visible damage from either tool traces back to technique, not the tool category itself — repeated closures on the same section, cutting too close to the scalp, or using the wrong tool for the hair’s fragility.
A quick check after every section catches most of it before it becomes visible in the finished cut — the Section-by-Section Read below shows what to look for at each stage.
| Signal | What you observe | Next action |
|---|---|---|
| Clear | Section settles cleanly, no visible line, weight or texture matches intent | Release surrounding hair and make a fresh decision — don’t repeat automatically |
| Caution | Flyaways appear, texture reads slightly uneven, or the section feels less connected than expected | Stop that section; consider point-cutting or styling to finish instead of a second pass |
| Stop | Visible line, wispy short pieces standing up, or snagging during the cut | End the procedure on that section; document what changed and plan a correction, not another cut |
Common mistakes that trigger a Caution or Stop signal (consistent with the patterns documented in independent thinning-shear mistake guides):
Regular scissors can be used for a rough approximation of either job — point-cutting removes small chunks of hair to fake texture, and slide-cutting can help remove a lot of hair fast on very thick sections — but neither substitutes for the tooth geometry that makes a purpose-built thinning or texturizing tool predictable. Any shear with smaller teeth and tighter spacing will give more even, less textured hair than one with fewer, wider teeth used for blending; that’s true whether the exact tooth count is 14 or 40. When hair lies flat and shows every strand, a texturizing shear that’s designed to create volume and texture will read as different from a thinning shear built to leave less hair without any visible change at all — and different hair types respond to that difference differently, so a technique that works on thick, coarse hair may look similar in name but behave nothing alike on thin, fine, or already-textured hair.
Industry practitioners on professional forums consistently describe the same root cause: visible damage is almost always poor sectioning or a repeated pass in one spot, not the tool category itself.
Pulling a single strand from an inconspicuous section and checking it in normal light — looking for a hard demarcation line between cut and uncut hair — takes about ten seconds and catches a mismatch before it’s visible on the whole head.
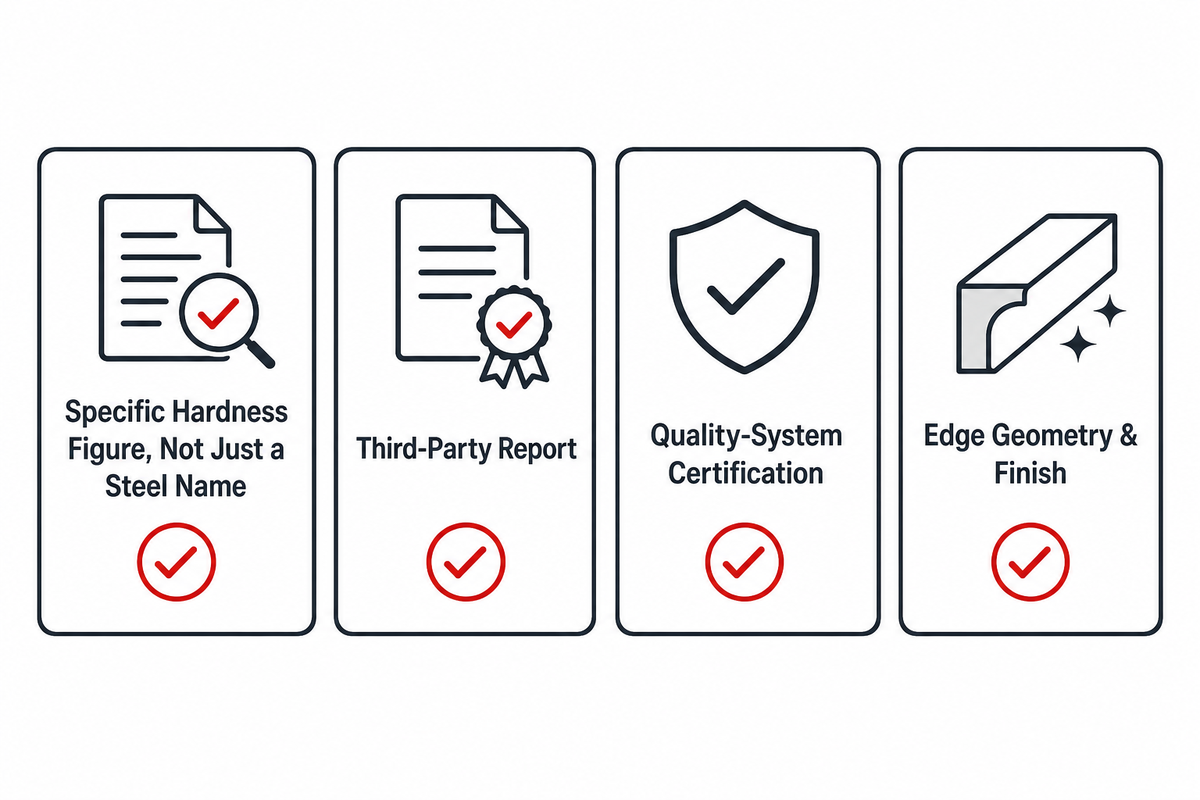
Professional-grade shears are designed less around the steel name on the box and more around how the steel is heat-treated, its edge geometry, and finish — that’s what really separates a pro-level thinning or texturizing shear from a consumer one built only to remove excess weight from the hair without any of that finishing care. Steel grade or hardness figure alone is one input; grinding, edge geometry, honing, and assembly quality determine how the finished tool actually cuts and how long it holds an edge. The closest formal materials standard in this space, ISO 7153-1, covers the stainless steels commonly used in medical-grade and other specific cutting instruments — shear manufacturers sometimes cross-reference it for steel-grade context even though it is not a hairdressing-specific standard.
When comparing suppliers, ask for the specific hardness figure (not just a steel-name claim), whether it’s backed by a third-party report, and what quality-system certification governs production — these are the checkable details that separate a documented, professional-grade tool from an unverified marketing claim. MATSUOPRO publishes its 440C, VG10, ATS-314, and cobalt-alloy tooth-count and hardness data directly on its factory-direct texturizing shear specifications, and its broader thinning and texturizing shear sourcing page covers private-label sample approval and RFQ scope for brands and distributors evaluating a supplier. For a deeper look at what a specific hardness figure actually means for edge life, see what HRC hardness means for shear steel.
Request Thinning & Texturizing Shear Specs →
These answers cover the questions that come up most when stylists first learn to use thinning scissors and texturizing scissors and thinning shears side by side, or when a client asks why one type of shear is “similar to texturizing” tools they’ve heard of but not quite the same. Because texturizing shears may look similar to thinning shears at a glance, most of the confusion is really a difference between thinning shears and texturizing shears question in disguise — once the tooth spacing is clear, so is the answer. Stylists searching phrases like best thinning and texturizing shears, texturizing scissors how to use, or thinning shears before and after results usually end up at the same underlying question, answered below.
This comparison guide has been assembled by the technical team at MATSUOPRO, makers of professional hair and pet-grooming shears since 2014. Our own tooth-count bands for the thinning, texturizing and chunking product ranges we make on the same 80-step factory line are drawn from our published specifications; the cross-brand tooth-count-vs-cut-ratio comparison cited above comes from another manufacturer’s own published data, not ours — which is why we point readers to a maker’s specific model data rather than a rule of thumb about tooth counts.
MATSUOPRO is the Mackay Hair Scissors manufacturing brand for professional hairdressing shears, barber scissors, thinning shears, and pet-grooming scissors. We support salons, distributors, academies, grooming brands, and private-label buyers that need factory-direct production with practical material guidance.
Our buying guides are written to help purchasers compare steel grades, handle styles, blade geometry, surface finishes, logo options, packaging, MOQ, and sample validation before placing an OEM or wholesale order. The goal is to make each scissors specification easier to discuss with a real production team.
Factory-direct supply since 2014, with product lines covering professional cutting shears, barber shears, thinning scissors, texturizing scissors, left-handed models, and pet grooming scissors for international B2B customers.
We focus on Japanese 440C, VG10, and ATS-314 steel choices, convex and bevel edge geometry, ergonomic handle balance, tension systems, logo engraving, private-label packaging, and sample-based OEM confirmation.