Get in Touch with Mackayhairscissors Company
We use submitted details to respond to your quote request. Read our Privacy Policy.

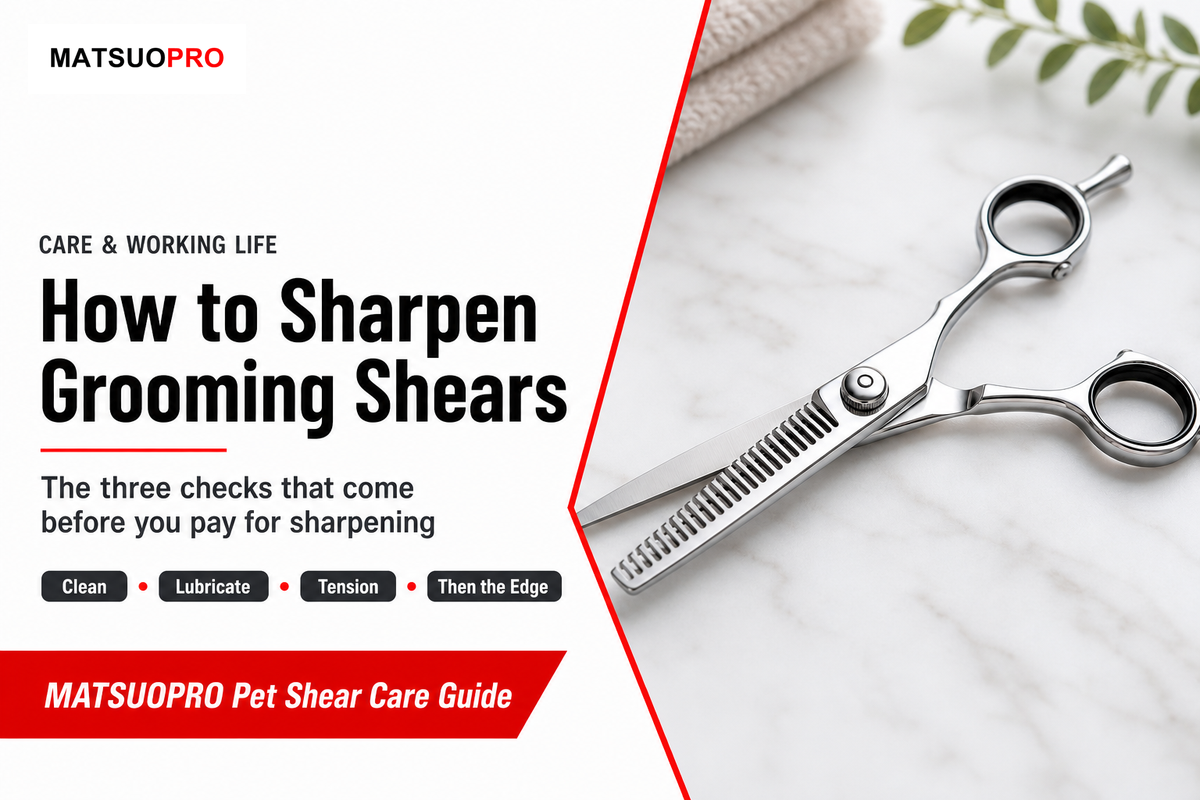
Pet grooming scissors & shears are the hand-held cutting tools a groomer finishes a coat with, and keeping them cutting is a maintenance problem before it is a sharpening one. Ask how to sharpen grooming shears and every guide to pet grooming scissors & shears will tell you to keep them sharp. Almost none tells you how to find out whether sharpness is actually your problem. How to sharpen grooming shears is, in practice, a question about who does it and what you rule out first, rather than a technique you can apply yourself. A shear that folds coat, drags, or clicks is sending a signal, and the edge is only one of the things it might be pointing at.
Short answer. Grooming shears should be sharpened by a professional sharpening service rather than at home, because a convex edge and its ride line are very hard to re-set by hand. Before you book one, run the Cheapest-First Rule-Out (clean, lubricate, tension, in that order) because a shear that folds coat is very often loose rather than blunt.
What this guide covers. The tool: what happens to it between dogs and across its working life. Hygiene, corrosion, tension, fault triage, and the sharpen-or-retire call.
What it doesn’t cover. Cutting technique. For how to hold and move a thinning shear on a dog, see our how to use thinning shears on a dog guide, and for very young animals the safe-use guide for puppies and kittens.
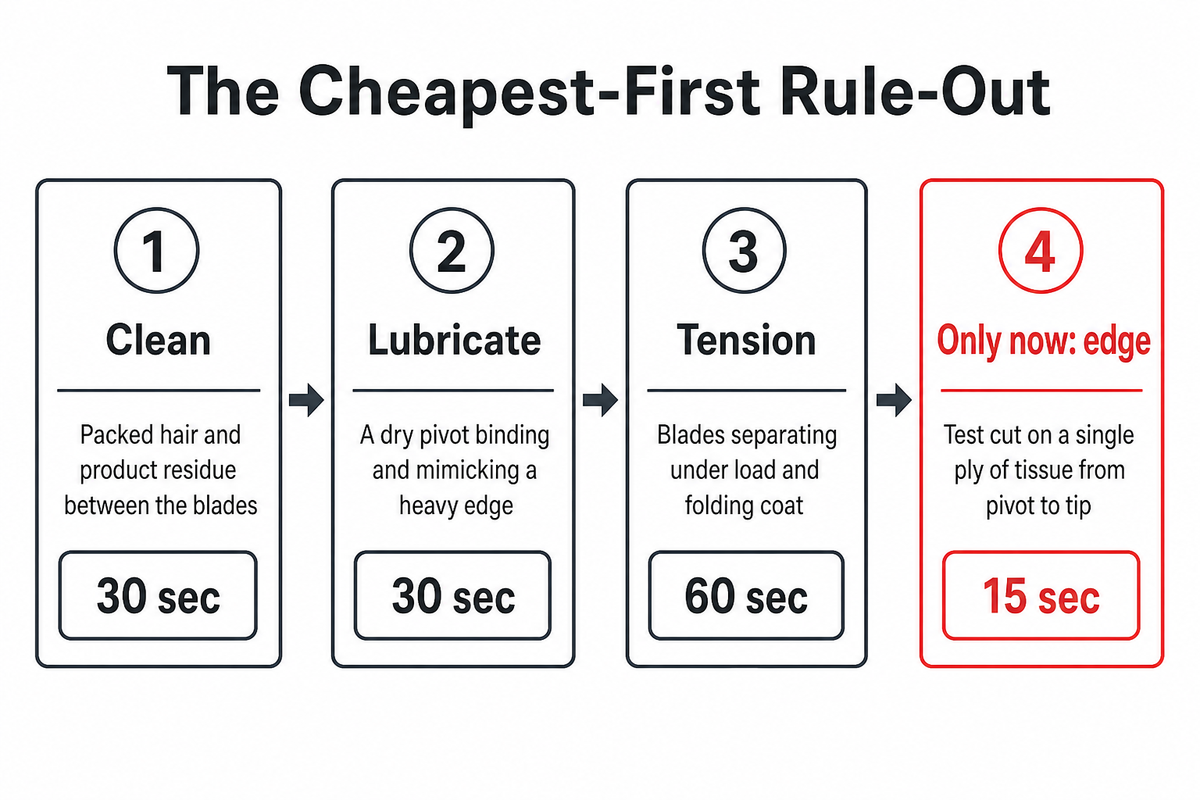
Most groomers notice it mid-morning. The coat starts bending away from the blade instead of parting. The obvious conclusion is that the shear has gone dull and needs sharpening. Sometimes that’s right. Often it isn’t, and the three checks that rule it out cost almost nothing and take about 2 min.
Your shears are the one essential tool you hold for the whole working day, and the gap between one in top condition and one that’s merely clean shows up as precision at the tip. Correct tension is a large part of that: a pivot set in its working range ensures precision where the blades meet, and a pivot outside it doesn’t, whatever the edge is doing. So the maintenance tips below are ordered by what they eliminate, cheapest first. Running them before you reach for the phone will save you time on the day and money over the year. We call that running order the Cheapest-First Rule-Out, and the rest of this guide refers back to it.
Work them in this sequence, because each one rules out something the next check would otherwise hide.
| # | Check | What you do | What it rules out | Time | Cost |
|---|---|---|---|---|---|
| 1 | Clean | Open wide, wipe the inside faces and the pivot with a soft cloth and a blade cleaner | Packed hair and product residue between the blades | 30 sec | Free |
| 2 | Lubricate | One drop of shear lube at the pivot, open and close ten times | A dry pivot binding and mimicking a heavy edge | 30 sec | pennies |
| 3 | Tension | Drop test, then adjust the tension screw a sixteenth of a turn at a time | Blades separating under load and folding coat | 60 sec | Free |
| 4 | Only now: edge | Test cut on a single ply of tissue from pivot to tip | Nothing — this is the diagnosis, not a check | 15 sec | Free |
One published convention, from a shear maker writing for barbers and stylists, is to hold the shears vertically with the tips pointing upward, open the top blade to about 90°, and release it. Correct tension makes the blade fall “halfway to two-thirds down the bottom blade” and stop. If it closes completely, tension is too loose. If it barely moves, it’s too tight and the cut will feel grindy.
A second convention, published in the pet grooming trade press in 2014 by sharpener Jeff Andrews, sets beveled shears so that the blades grab “about three-fourths of an inch from the tip”: roughly 19 mm, which lets them slice from the pivot right through to the tips. Note the scope: that one is written for a beveled edge and describes where the blades should meet, not how far a released blade should fall, so it isn’t a rival reading of the same test.
Those two conventions aren’t the same test, and there’s no measurement standard behind either. Nobody publishes a tolerance, a repeatability figure, or a rule for whether the same number applies to a straight, a curved and a thinning shear. Every article that gives you one number as if it were settled is quietly picking a side. Pick one convention, use it consistently on your own shears, and learn what your own tool feels like when it’s right; that is the part that actually transfers.
The mechanism underneath both is the same. When tension is too loose, the blades separate microscopically under load and the hair bends before it’s severed. On a convex shear specifically, Andrews notes that loose tension produces two distinct faults at once: the blades may grab three-quarters of an inch (about 19 mm) from the pivot and gouge, and they can fold hair at the tips.
“If the shears are bending the fur, it may be that the tension is too loose. Make the necessary adjustments, but if the issue is not resolved and the fur is still being pushed off of the blade, your shears are most likely dull.”
— Sensei Shears, 6 Signs Your Grooming Cutting Shears Need Sharpening, 2019
That’s a check order, not a diagnosis. It doesn’t say tension is the more common cause; it says tension is the cheaper thing to eliminate. It also comes from a company that sells shears, and we’ve said so rather than dressing it up as research, because there’s no controlled study that separates a loose pivot from a dull edge by symptom alone.
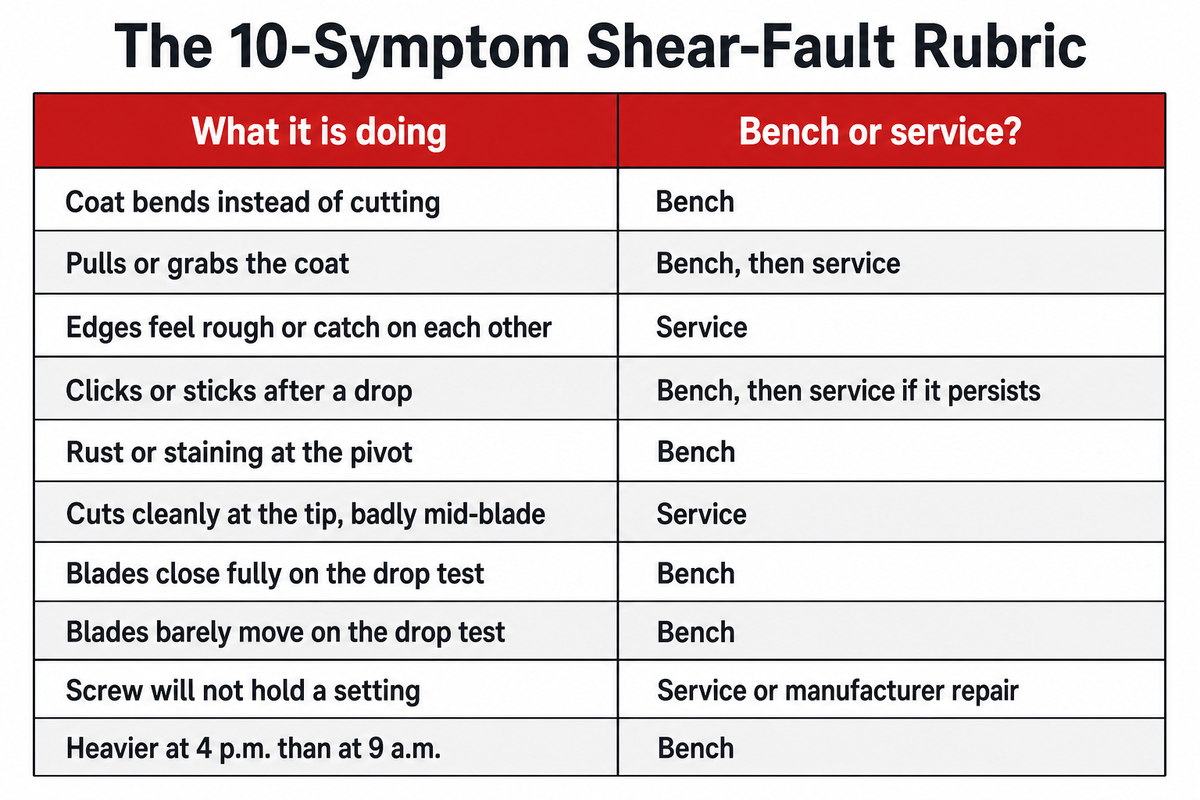
Most maintenance advice runs forwards: here’s a care routine, follow it. That’s useless at 11 a.m. with a wet dog on the table and a shear that has started misbehaving. The 10-Symptom Shear-Fault Rubric runs backwards instead, from the symptom you actually have. Every row below is a fault pattern that recurs in the trade-press care literature cited in this guide; the causes and the bench-or-service calls are our reading of it, not a survey of groomers.
| What it is doing | Most likely cause | First action | Bench or service? | If ignored |
|---|---|---|---|---|
| Coat bends instead of cutting | Tension too loose; blades separating under load | Drop test (60 sec), then tighten a sixteenth of a turn | Bench | Uneven cuts and wasted passes |
| Pulls or grabs the coat | Dull edge, or residue on the inside faces | Clean first (30 sec), retest, then book sharpening | Bench, then service | Discomfort for the dog; more force from you |
| Edges feel rough or catch on each other | A burr or a nick on one edge | Inspect the edge under good light, 15 sec per blade | Service | The burr scores the mating blade |
| Clicks or sticks after a drop | Raised burr where the tip hit the floor | Close and open slowly through the sticking point, 10 times | Bench, then service if it persists | Progressive damage to both blades |
| Rust or staining at the pivot | Hair left inside the blades holding moisture | Strip, dry, lubricate; change the end-of-day habit, 2 min | Bench | Pitting that no sharpener can undo |
| Cuts cleanly at the tip, badly mid-blade | Ride line worn unevenly, or a dent | Tissue test along the full blade length to map it | Service | You unconsciously cut with the tip only |
| Blades close fully on the drop test | Tension well below working range | Adjust and recheck before any cutting, 60 sec | Bench | Accelerated edge wear on both blades |
| Blades barely move on the drop test | Over-tightened pivot | Back off in 1/16-turn increments until it falls, 60 sec | Bench | Extra hand force for every single cut |
| Screw will not hold a setting | Worn tension assembly or washer | Stop adjusting; note how fast it drifts over 3 days | Service or manufacturer repair | Tension changes mid-dog, unpredictably |
| Heavier at 4 p.m. than at 9 a.m. | Tension drift plus accumulated residue | Clean and drop-test before the first dog, not after the last, 90 sec | Bench | You absorb the difference through your hand |
Two things this rubric deliberately won’t do. It won’t tell you what a bad haircut means; that is a question about the cut, not the instrument. It also won’t tell you which shear to buy, because if the honest answer to a row is this tool was never right for this job, that decision belongs on our pet grooming scissors and shears page, not here.
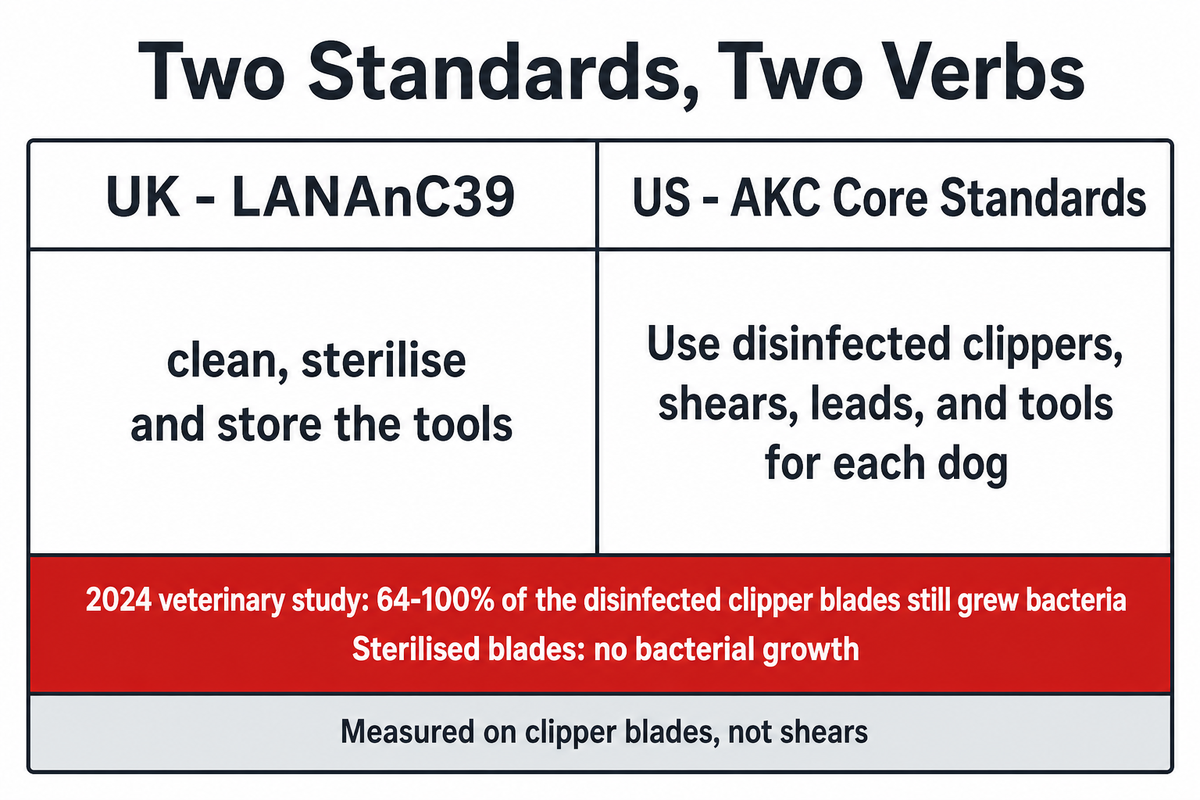
This is the part of tool care most often reduced to a slogan. It deserves better, because two current occupational standards use two different verbs for it, and the difference between those verbs has been measured.
The UK National Occupational Standard LANAnC39, “Style and finish a dog’s coat” (developed by Lantra, version 2, approved 2020), lists as a performance criterion that the groomer must “clean, sterilise and store the tools and equipment used for styling and finishing in accordance [sic] the relevant legislation, manufacturer’s guidelines and organisational policy, and report any faults.” The same standard requires the groomer to “maintain hygiene and bio-security in accordance with workplace instructions.”
The American Kennel Club’s National Core Professional Dog Grooming Educational Standards put sanitation in its own core standard and phrase the requirement differently: “Use disinfected clippers, shears, leads, and tools for each dog,” with disinfectants that are “bactericidal, virucidal, and fungicidal compliant and registered by the United States Environmental Agency [sic] (EPA).”
Sterilise. Disinfected. Those aren’t synonyms, and a 2024 peer-reviewed veterinary study measured the size of the gap between them.
“The results showed that 64–100% of the disinfected clipper blades, from all three hospitals, were contaminated with bacteria, whereas all the sterilized clipper blades were negative for bacterial growth (p < 0.05). … The results indicate that the disinfection routines were not sufficient for removing bacteria from used clipper blades.”
— Gustafsson, Wikström, Mueller & Bergvall, Veterinary Sciences 2024;11(1):38
Read the conditions carefully, because they’re what make the finding uncomfortable. All three hospitals were following national recommendations for hygiene in veterinary medicine. The blades had been through the routine. Staff considered them ready for use. The routines themselves were reasonable, and are described by Gustafsson and colleagues as a toothbrush clean followed by 40–45% isopropanol or 75% ethanol. And 64–100% of those blades still grew bacteria, while every sterilised control grew none.
Scope, stated plainly. That study sampled powered clipper blades in veterinary referral hospitals. It didn’t sample shears, and no percentage from it applies to a shear. What transfers is the principle, not the number: a wipe-down is a cleaning step, and calling it decontamination is a category error. It is also, four years after LANAnC39 was approved, a measured illustration of the distinction its wording already drew.
There’s a second reason the tool matters more than the bench does. The Merck Veterinary Manual chapter on dermatophytosis in dogs and cats, reviewed in February 2025, states that “transmission from spores in the environment is inefficient unless there is microtrauma (eg, clipping of hair coat with contaminated clippers, tack) to the skin.” Environmental spores are a weak route. A contaminated clipper blade that breaks the skin barrier isn’t, and the same physical route is open to any instrument that abrades skin. That’s the whole argument for treating the things in your hand differently from the things on your table.
What should a professional groomer actually do between dogs? The honest answer is that no single method can be prescribed from a web page, and anyone who prescribes one is skipping three variables: the disinfectant’s own label, the shear manufacturer’s instructions, and the rule currently in force where you work. Read all three, and note that they can conflict: bleach will rust a pivot regardless of what any general sanitation guidance says about hard surfaces.
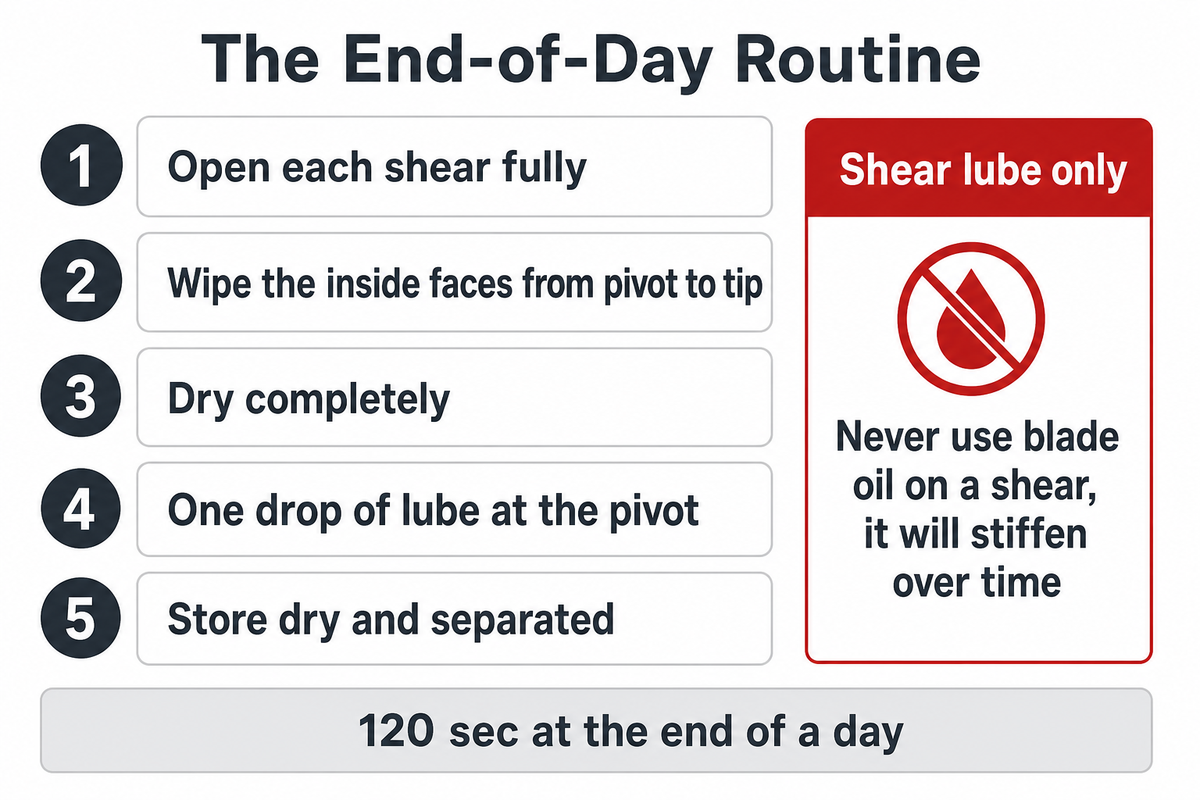
Pet grooming is wet work, and shears live in it. The failure is rarely dramatic. It’s a slow loss of sharpness and a pivot that stops holding a setting, and it usually starts with hair left inside the blades overnight.
“Clean your shears daily. Wipe all the hair from the inside of the blades, this attracts moisture which can rust your shears. … Lubricate shears with shear lube only, it contains silicon and a light solvent. … Never use blade oil on a shear, it will stiffen over time.”
— Jeff Andrews, A Quick Guide To Shear Care, Groomer to Groomer, 2014
That last line answers a question groomers ask constantly, and answers it against convenience: the clipper oil already sitting on the bench is the wrong lubrication for a shear. Blade oil is formulated for a clipper blade set, and on a shear pivot it thickens over time and adds drag you’ll feel in your hand long before you diagnose it. One drop of shear lube at the pivot is all it takes, and it is the difference between a shear that stays smooth and one that starts dragging months before it should.
A workable end-of-day routine for grooming tools that live in wet coat: open each shear fully, wipe the inside faces from pivot to tip with a dry cloth, follow with a cleaner if you’ve used product, dry completely, one drop of lube at the pivot, then store dry and separated rather than loose in a drawer where the tips can meet. Two minutes at the end of a day, 120 sec on the same clock as the table above, is proper care; it’s also the cheapest thing in this article, and over a year it saves you money in service charges.
Steel matters here, but less than the habit does. The pet grooming line we manufacture is published as Japanese 440C at 58–60 HRC with a hand-honed convex edge; those are our own published figures for our own product, not an independent test result. If you want the longer explanation of what a hardness number does and doesn’t tell you, we wrote that separately: what HRC hardness actually means.
If the Cheapest-First Rule-Out comes back clean and the tissue test still fails, the shear needs sharpening. The next question is who does it, and the answer for any decent dog grooming scissor is a professional sharpener.
It helps to see this as two separate jobs rather than one. Maintaining and sharpening dog grooming tools splits into the daily scissor maintenance you do yourself and the shear sharpening you buy in. You can maintain and sharpen a working roll indefinitely as long as you keep those two apart; problems start when someone tries to substitute one for the other. If you genuinely want to learn how to sharpen as a trade, that’s an apprenticeship with a flat hone and a lot of practice steel, not a weekend project on your own kit. Note too that dull shears aren’t the same failure as loose ones, which is why the checks came first.
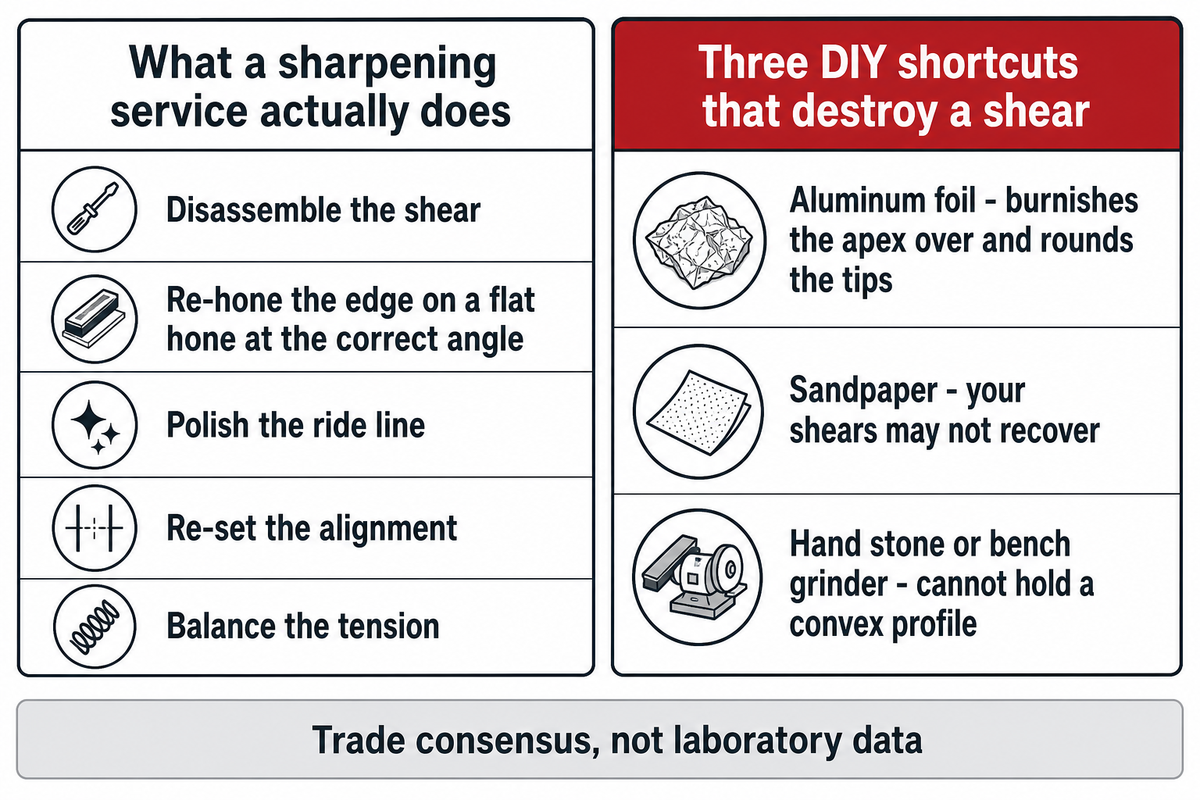
Any competent sharpening service does five things, and only the first is what most people picture. They disassemble the shear. They re-hone the edge on a flat hone at the correct angle. They polish the ride line, the narrow contact path where the blades meet as they close. They re-set the alignment. Then they balance the tension before it goes back in the post. Take any one of those away and you have a shear that is sharp and still will not cut.
No published test series settles these three. What follows is published trade guidance, quoted where the wording matters, and it should be read as trade guidance rather than as laboratory data.
The edge geometry is what decides this. A beveled edge presents a flat facet and is comparatively forgiving, so a beveled shear can survive a mediocre service. A convex edge is a continuous curve with no flat to register against, which is what makes it slice rather than push, and it’s unforgiving: restore it freehand and you’ve replaced the curve with a facet permanently. Curved and thinning shears raise the difficulty again, because the hone has to follow the curve and, on a thinner or on chunkers, work around teeth without touching them.
The care routine isn’t identical across a roll. Nine builds, and what actually changes for each. This is about servicing the tool you already own; which build to buy for which job is a different question, answered on the curved dog grooming shears and thinning shears for dogs pages.
| Build | Edge type usually | Cleaning difficulty | Sharpening difficulty | Its characteristic failure |
|---|---|---|---|---|
| Straight finishing, 190 mm | Convex | Low | Moderate — the flat-hone baseline | Ride-line wear from mid-blade use |
| Curved, 190 mm | Convex | Low | High — the hone must follow the arc | Tip alignment lost after a drop |
| Thinner / blender, 28–40T, typically 165 mm | Convex cutting blade, toothed mate | High — hair packs between teeth | High — one blade only, teeth untouched | Residue between teeth read as dullness |
| Chunker, 175 mm | Convex, wide teeth | Moderate | High — tooth crowns must not be touched | Chipped tooth crown from a hard object |
| Texturizer, 24T, typically 190 mm | Convex | High | High | Uneven cuts once one tooth is bent |
| Safety-tip / ball-tip, 200 mm | Convex with a rounded tip | Low | Moderate — the tip radius must survive | Tip ground to a point by a careless service |
| Short detail (under 6″ / 150 mm) | Convex | Low | Moderate | Tip damage; the whole blade is the tip |
| Long body (8″ / 200 mm and over) | Convex or beveled | Low | Moderate — a longer ride line to hold true | Mid-blade dip that only shows on long strokes |
| True left-handed, 190 mm | Convex, mirrored | Low | Moderate — but confirm the sharpener handles them | Serviced as right-handed and ruined |
The mechanics of how to sharpen grooming shears for dogs are no different from any other professional shear; what differs is how much wet coat they see between services. Nobody should try to sharpen grooming shears by hand, but everybody has to find someone who can. Searching for grooming shear sharpening near you will usually turn up two kinds of provider, and they aren’t interchangeable. A local bench lets you hand the tool over, describe the fault, and collect it without the post in the loop; the risk is that some benches are set up as a dog grooming blade sharpener first and treat shears as a sideline, which is where convex edges get flattened. A mail-in specialist is likelier to own a flat hone and a proper set-up jig, at the cost of your shears being off the bench for the round trip.
Either way, one question sorts them. Ask what happens to a convex edge on their machine. Anyone who answers by describing sharpening dog grooming scissors at home, by hand, or on a stone has told you they will flatten it. A dog grooming scissor sharpener who talks about ride line, set, and tension before they mention the edge is the one to use.
Published intervals for sharpening shears disagree, and every source qualifies its own figure. One trade source advises planning to sharpen “at least once a year”, which is every 12 months, while others put it at every 3–6 months, and thinning shears at every 3–4 months.
All of them add the same caveat: it depends on how much you cut, how dense the coats are, and how well you maintain the tool in between. Treat the range as a prompt to test, not as a calendar. The tissue test is the actual answer, and it takes 15 seconds.
Before you post anything, ask the sharpener four questions: what machine do you use, do you sharpen convex and beveled differently, do you re-set tension before return, and what’s your turnaround, counting bench time and shipping each way. Ask as well whether they handle blades and shears or only one of the two, because clipper blade work and shear work are different machines and different skills. Pack in a padded envelope with the shears closed and protected, bubble wrap around the blades, not just around the box, so nothing arrives with a fresh nick.
One that has been sharpened properly comes back with its ride line polished, its alignment set and its tension balanced, and you’ll feel all three on the first dog. That, rather than any specification on a box, is what a smooth grooming experience is built on.
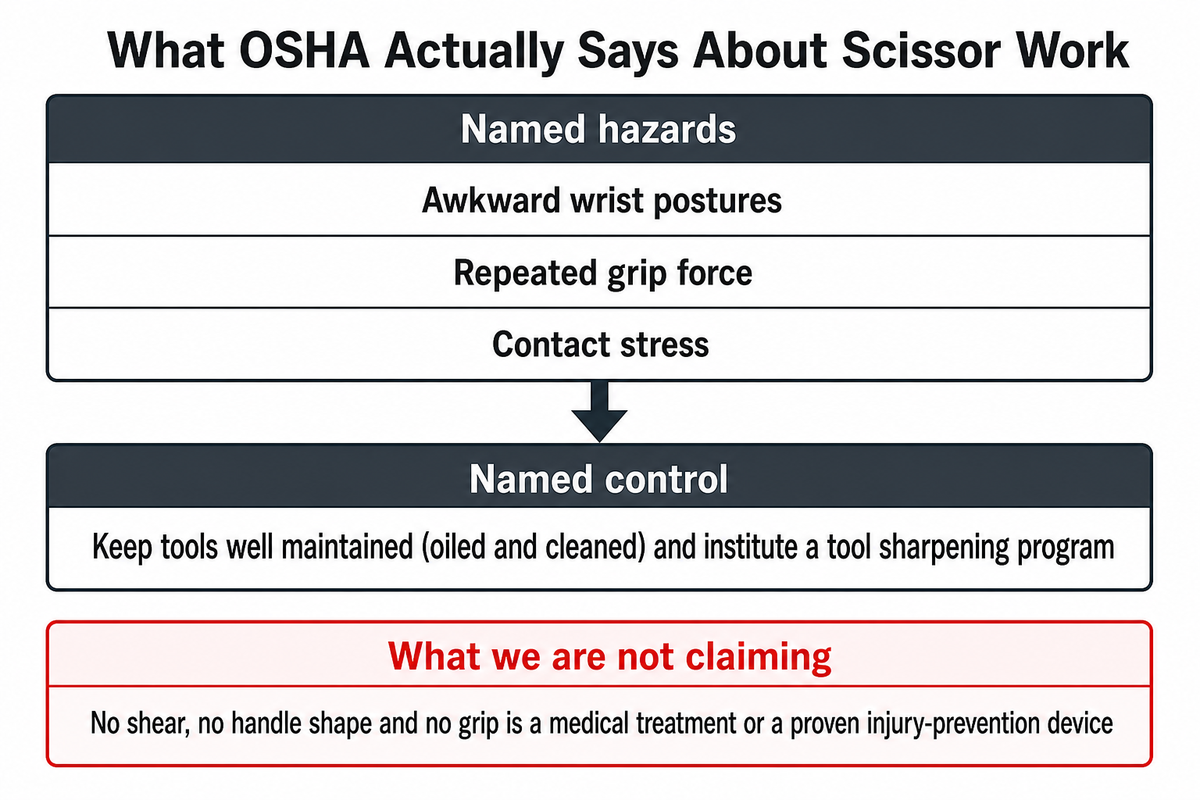
There’s one documented link between how a tool is maintained and how a working day feels, and it comes from an unexpected place. The US Occupational Safety and Health Administration publishes guidance on manual scissor work in sewing operations, and it names the hazards as “repeated exposure to awkward wrist postures, repeated grip force, and contact stress.”
Among the controls OSHA lists is this one: “Reduce the amount of force needed to operate tools by: keeping tools well maintained (i.e., oiled and cleaned), and instituting a tool sharpening program.” Maintenance is framed there not as housekeeping but as a way of lowering the force a person has to apply, thousands of times in an 8 hr day.
What we aren’t claiming. That guidance was written for sewing operations, applied here to the same tool class, and it describes a general occupational control. No shear, no handle shape and no grip, ours included, is a medical treatment or a proven injury-prevention device, and we won’t present one that way. If your hands or wrists hurt, that’s a question for a clinician, not for a tool catalogue.
What’s fair to say is narrower and still useful: a clean, correctly tensioned, properly sharpened shear takes less force to close than a neglected one. That’s why the checks in this guide are worth two minutes of a professional grooming day.
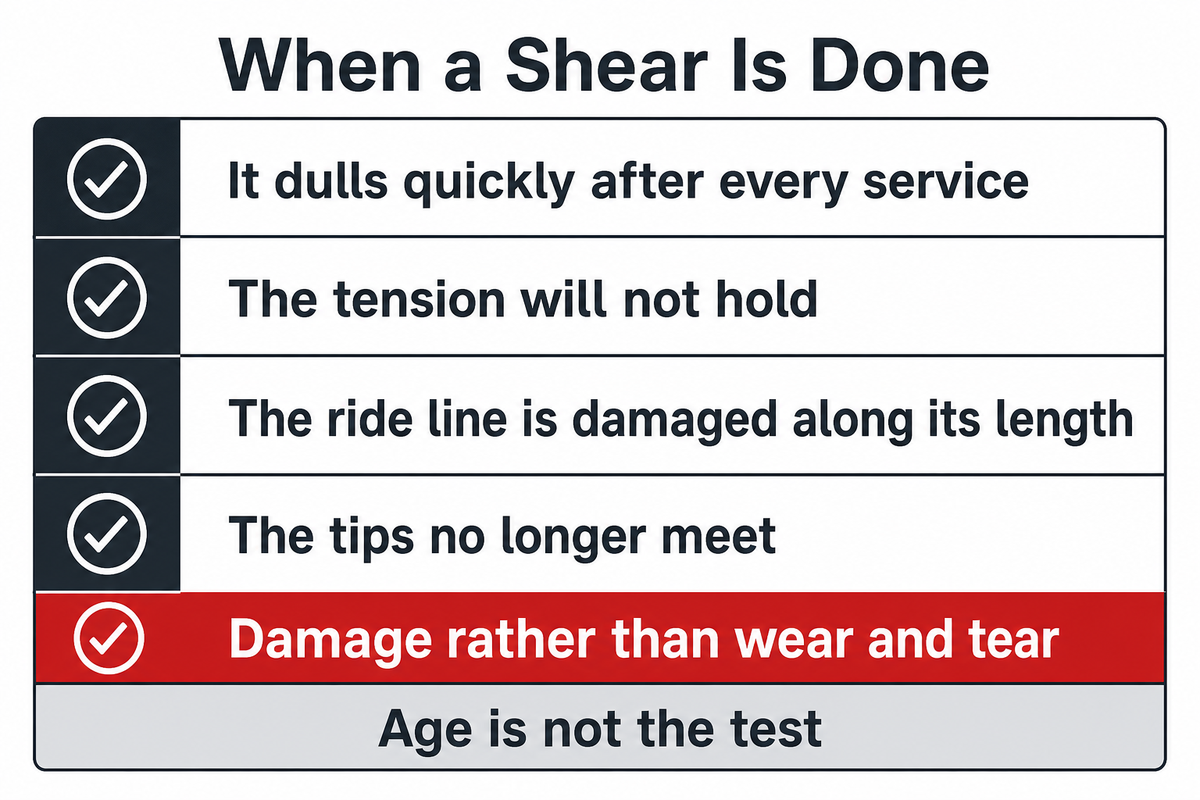
Not every shear is worth servicing again, and a good dog groomer usually knows it a week before they admit it. The retire decision is not about age: a 15-year-old shear that still holds a set is worth another service, and a 2-year-old one that has been dropped twice on a tiled floor may not be. What matters is whether the damage is the kind a hone can reverse. Four signals, in rough order of severity:
Those four are damage rather than wear and tear, and the distinction is the whole decision. Ordinary wear is what a service exists to reverse; the list above is what a service can’t. Set against that, a well-kept shear has a genuinely long lifespan, and its longevity is almost entirely in the owner’s hands rather than the maker’s. Sensei Shears says a high-quality groomer’s shear “may even last for as long as 20 years, if not more,” and attaches the condition in the same breath: it “largely depends on maintenance,” because “the original edge will require professional sharpening annually.” They sell shears and a sharpening service, so read it as a trade claim rather than a measured service life. The condition is the part worth keeping either way.
Retired doesn’t have to mean scrap. Demoted to rough work, a shear that’s no longer accurate enough for a finish line will still do sanitary trims and mat sectioning for years. Just mark it, and keep it out of the roll you reach into without looking. The arithmetic is worth doing before you write anything off: a shear serviced every 6 months across a 20-year life is about 40 services, which is what that 20-year figure quietly assumes. If you’re weighing another service against a replacement, the arithmetic, not our opinion, belongs in the shear cost-per-year calculator.
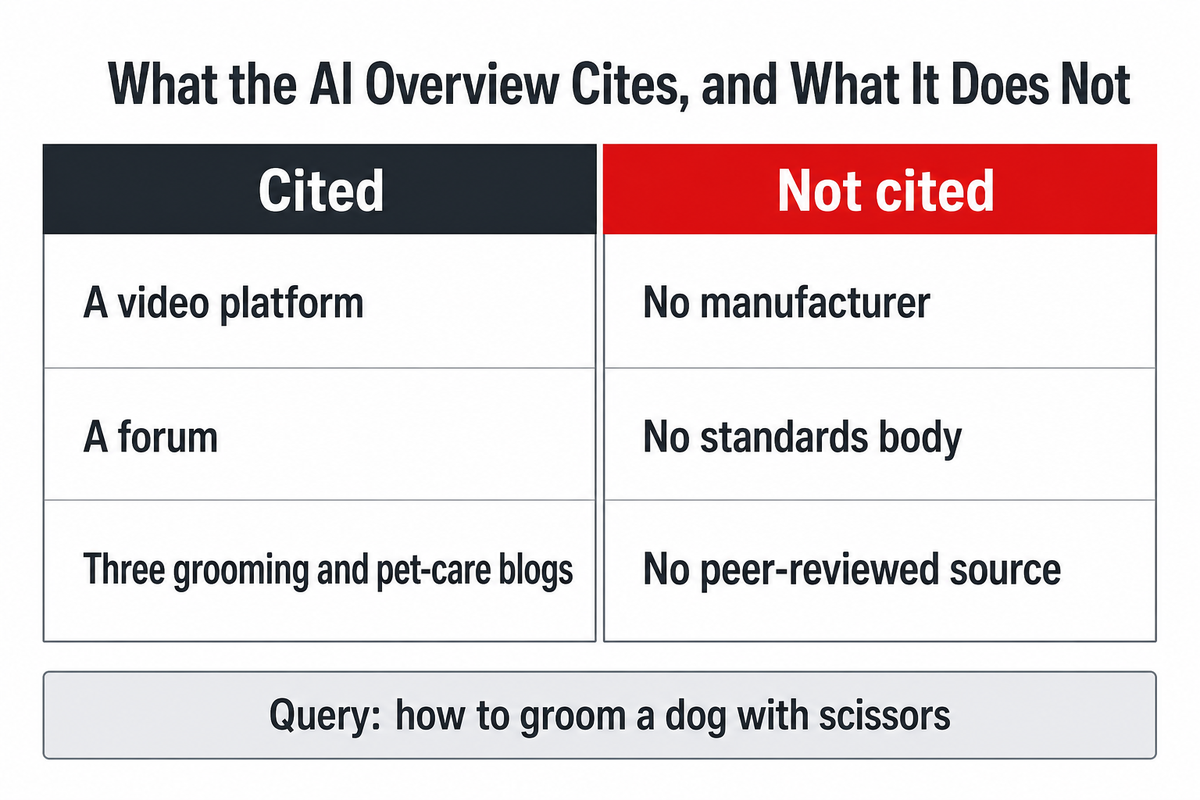
The general tool-care question is being absorbed by the answer layer, and it’s being answered from video. Of the queries in this cluster we checked, the one that returns an AI-generated overview at all is how to groom a dog with scissors, and it answers from five cited domains: a video platform, a forum and three grooming and pet-care blogs.
It cites no manufacturer, no standards body and no peer-reviewed source, even though LANAnC39, the AKC core standards and a 2024 study in Veterinary Sciences all say something more precise.
That’s the shift worth planning around. The demand for “how do I start” content is being answered upstream of the click. What survives is the specific, checkable, sourced answer to a question a video can’t handle: what the standard actually says, what the study actually measured, what the two published tension conventions actually disagree about. For a salon owner that changes what’s worth reading; for anyone publishing, it changes what’s worth writing.
We had intended to close with a market-size figure and have deliberately dropped it. Published estimates for the US pet grooming services market differ between research firms by enough to change the story, one figure circulating in grooming blogs sits several times above the research-firm numbers for the same category, and none of them was traceable to a method we could check. A number we can’t stand behind is worse than no number, so here’s what we can stand behind instead, with its provenance attached: on DataForSEO’s twelve-month average retrieved 25 August 2026, how to sharpen grooming shears runs at about 110 monthly US searches, and the answer engine now resolves most of them before anyone clicks.
Published guidance ranges from at least once a year to every three to six months, with thinning shears often put at three to four. Every source that gives a figure qualifies it by cutting volume and coat density, a fair sign the calendar is the wrong instrument. Use the tissue test: cut a single ply along the full 165–203 mm of the blade, and book the service if any part folds or drags rather than parting it cleanly.
For any shear worth owning, no. A convex edge is a continuous curve with no flat for a stone to register against, so freehand work replaces the curve with a facet permanently. Do the maintenance yourself and buy the sharpening.
No. It’s the most-repeated hack in grooming groups and the trade guidance on it is unambiguous: doing this will leave your shears rounded and will require more work to sharpen properly afterwards. Cutting foil burnishes and rolls the apex over rather than removing steel at a controlled angle, and it rounds the tips, which is the part of a detail shear you most need intact. Sandpaper is the same mistake with coarser grit.
Use shear lube, which contains silicone and a light solvent. The trade guidance is specific that blade oil, the clipper oil already on your bench, should never go on a shear: it stiffens and adds drag at the pivot. Household oils gum and collect hair.
Daily at minimum, and the reason is corrosion rather than tidiness: hair left on the inside faces of the blades holds moisture against the steel. In wet work that is how pitting starts at the pivot, and pitting is the one form of damage no sharpener can undo. Wipe the inside faces from pivot to tip, dry completely, then lubricate. About 30 sec per shear, which is the cheapest insurance in this article.
Often, yes. Dropping a shear usually raises a small burr where the edge hit. Close and open it slowly through the sticking point a few times; if the catch clears, you were lucky. If not, send it out rather than working at the burr yourself.
Follow the rule in force where you work. The AKC core standards require disinfected clippers, shears, leads and tools for each dog, using EPA-registered products that are bactericidal, virucidal and fungicidal compliant; the UK standard LANAnC39 uses a stronger verb: cleaned, sterilised and stored. A 2024 study found blades disinfected to national recommendations still contaminated in 64 to 100 per cent of samples; sterilised controls were clean. Clean mechanically first, at the contact time the label states.
Yes, and the price usually reflects it. A curved blade is honed along its arc rather than against a flat, and a thinner or chunker needs its cutting blade restored without the hone ever touching the teeth. Ask whether they handle both.
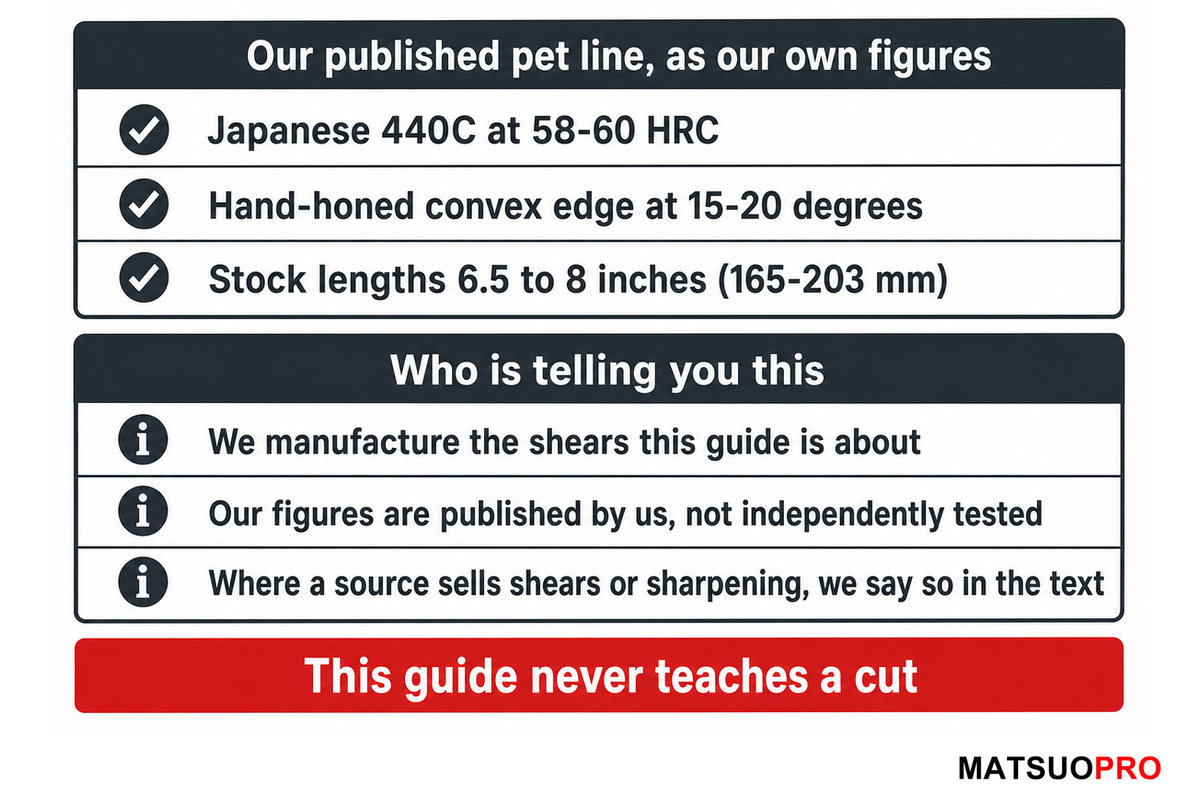
We manufacture the tools this article is about, so here’s what that means in practice. Every specification we quote for our own product is our own published figure rather than an independent test result, and we have flagged it as such wherever it carries an argument.
Where a number came from a published source, that source and its date are named in the sentence that uses it, not only in the reference list at the end; where a figure is ordinary trade practice rather than published data, we have not dressed it up as measurement.
Our pet line is published as Japanese 440C at 58–60 HRC with a hand-honed convex edge at 15–20°, in stock lengths from 6.5 to 8 inches (165–203 mm), with the current pet grid built at 190 mm and 200 mm, and we hand-tension and inspect each pair before it ships. The full published grid, so you can hold this article to it: MP-SC-077 curved finishing 190 mm; MP-SC-078 curved thinning 190 mm at 28T; MP-SC-079 texturizer 190 mm at 24T; MP-SC-080 fine blender 190 mm at 40T; MP-SC-081 and MP-SC-082 straight 190 mm; MP-SC-083 safety-tip 200 mm.
Where a claim in this guide comes from a company that sells shears or sharpening, we’ve said so in the text rather than letting a commercial source read as research. Where the published sources disagree, as the two tension conventions do, we’ve shown the disagreement instead of picking the tidier number. And where the evidence is about clipper blades rather than shears, we’ve said that too, in the paragraph itself.
One deliberate omission: this guide never teaches a cut. Technique on a live animal is a separate craft with separate risks, and it’s covered elsewhere, including the safety-tip shears for puppies and kittens range and its companion guide for the youngest animals. Keeping the two apart is how both stay accurate.
Search-demand figures in this article are DataForSEO estimates retrieved on 25 August 2026 for United States desktop search, and are twelve-month averages rather than single-day counts: how to sharpen grooming shears at 110 monthly searches, how to clean dog grooming scissors and how to disinfect grooming tools at 10 each. The observation about the AI-generated overview is a direct reading of the five cited domains returned for how to groom a dog with scissors on the same date; that was the query in this set that returned an overview.
Building a kit that’s worth maintaining?
We forge and hand-finish pet grooming shears in Japanese 440C, hand-tension every pair, and publish the specifications so you can check them. Stock orders from a single piece; custom and private-label from 50.
MATSUOPRO is the Mackay Hair Scissors manufacturing brand for professional hairdressing shears, barber scissors, thinning shears, and pet-grooming scissors. We support salons, distributors, academies, grooming brands, and private-label buyers that need factory-direct production with practical material guidance.
Our buying guides are written to help purchasers compare steel grades, handle styles, blade geometry, surface finishes, logo options, packaging, MOQ, and sample validation before placing an OEM or wholesale order. The goal is to make each scissors specification easier to discuss with a real production team.
Factory-direct supply since 2014, with product lines covering professional cutting shears, barber shears, thinning scissors, texturizing scissors, left-handed models, and pet grooming scissors for international B2B customers.
We focus on Japanese 440C, VG10, and ATS-314 steel choices, convex and bevel edge geometry, ergonomic handle balance, tension systems, logo engraving, private-label packaging, and sample-based OEM confirmation.