Get in Touch with Mackayhairscissors Company
We use submitted details to respond to your quote request. Read our Privacy Policy.

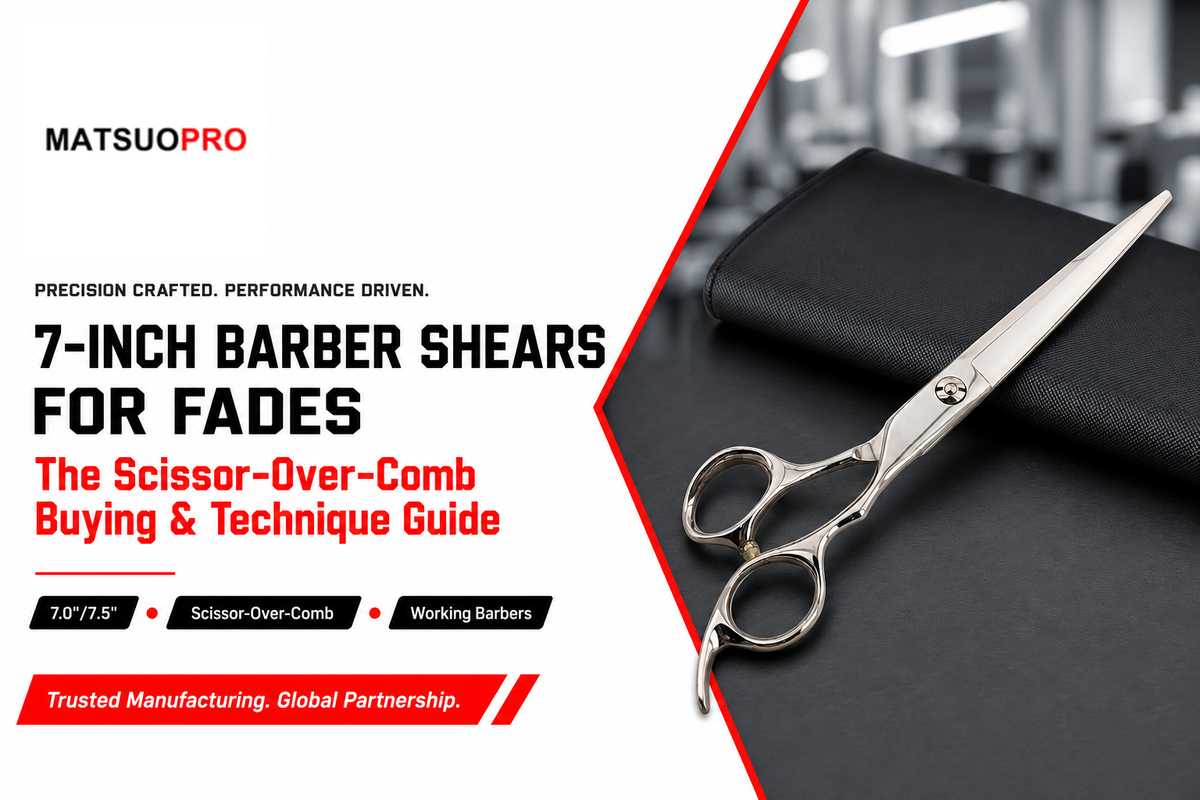
7-Inch Barber Shears for Fades are shears sized specifically to solve one mechanical problem: reaching from one side of the comb all the way to the other in a single pass during scissor-over-comb cuts. That one single problem is responsible for most of what’s in this guide: why even a salon shear around 5.5 inches long can start feeling difficult mid-stroke, why professional barber shears specifically for fade cuts tend to run longer than salon-grade hair cutting scissors, why most barbers and hairdressers use two lengths of shears during the same haircut, and why the buying checklist for professional hair shears is so different from what you’d expect from a spec sheet. If you’re an individual barber looking for the best shears for cutting hair professionally, not just any hairdressing scissors, this is for you. If you’re sourcing bulk orders for a barbershop or looking to launch a private label shear line, you’ll want our 7-inch wholesale specification and procurement guide.
| Blade lengths | 7.0″ (standard) / 7.5″ (thicker hair, larger hand) |
| Best-fit technique | Scissor-over-comb, mid-to-large section blending |
| Edge type | Convex (hamaguri) — glides through repeated open-close cycles |
| Pairs with | A shorter 5.5″-6.0″ shear set for hairline/detail cleanup |
What exactly is the tool, then?
While descriptions vary from ” inch professional hair cutting set” to “hair cutting scissors professional barber shears” to “cutting scissors professional barber shears,” the fundamental tool specifications remain consistent. Look for models with 7 inches of length and a convex edge, whether they’re marketed as japanese 440c steel, 440c stainless steel, japanese stainless steel, or vg-10 japanese steel. These designations refer to the material composition and quality of the blade, but the core functionality driven by length and edge remains unchanged regardless of how it’s marketed.
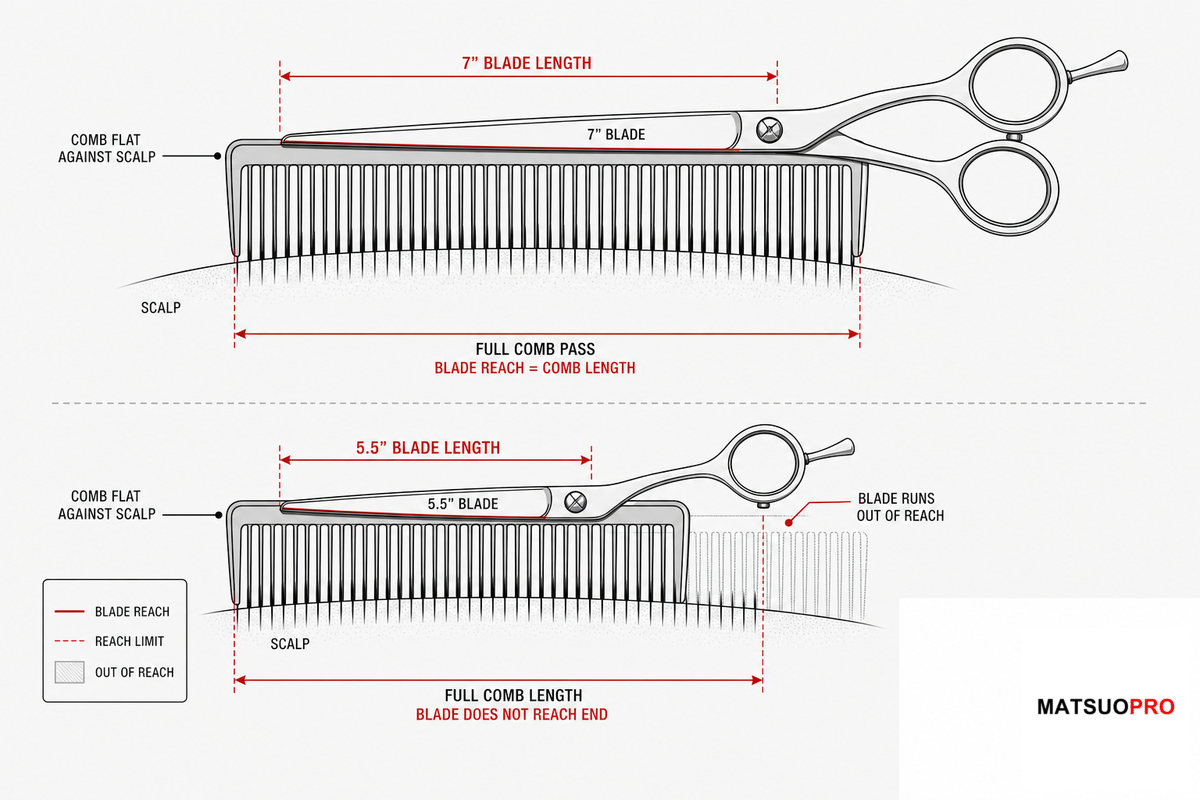
Blade length decides whether scissor-over-comb works because a longer shear completes a full comb pass without running out of reach mid-stroke. A shorter salon shear physically can’t, which forces your hand into the cutting path and produces a choppier, less graduated line.
The core issue: Scissor over comb isn’t about the edge; it’s about reach. You’ll put the comb flat against the scalp, pick up a section, and run the cutting blade along the spine of the comb, removing anything that extends beyond it. Cutting with too-short blades means you run out of comb before you’ve a chance to properly thin out the section, leaving you with an unblended, choppy result, even extremely sharp blades can’t fix a reach problem.
Razor-sharp edges don’t solve the reach problem: the barber’s hand still gets pushed closer to the section being cut, and that proximity results in a less-than-smooth, graduated finish. One working barber summed up the problem on r/Barber: cutting scissor-over-comb fades all day with a 5.75-inch shear meant constantly repositioning mid-stroke, especially on the thicker sections near the crown. After months of fighting the reach across a full book of appointments, they started shopping for a longer pair, naming premium 7-inch-plus Japanese brands as the upgrade under consideration. That’s a familiar arc: barbers usually don’t size up until the short shear has already cost them clean lines on a busy day.
In practice, on the floor of a working barbershop, professional technique typically recommends shears at 6.5 inches or longer for effective scissor-over-comb cutting. Weight distributed towards the pivot can provide some stability through the cutting stroke, but the importance of reach can’t be overstated.
Hair texture’s effect on reach margin.
Texture influences how much margin of error you’ve with your comb length. Thicker, coarser hair consumes comb length much more rapidly than fine, straight hair – that’s why some 7.5-inch shears exist alongside the more common 7-inch ones. A breakdown of the process from a barbering school clearly explains the consequence of short blades: they force your hand into the cutting path.
Using the tips of your blades to cut the hair instead of the full central section only exacerbates this issue, creating noticeable horizontal steps in the cut. Extra length offers protection against both of these issues.
What to do if your shear still feels short.
Your 7-inch shear can feel like the perfect fit for most heads of hair, then come up short on thicker, denser sections. Working constantly with large volumes of heavy hair? Consider moving up to a 7.5-inch shear before concluding the problem lies in your technique.
Scissor-over-comb isn’t a footnote in barber training. New York State’s official 500-hour barbering curriculum defines it as its own required performance objective under Subject 8.2, Scissor Haircutting – taught and tested separately from clipper-over-comb and razor-over-comb. Utah’s state-mandated cosmetology/barbering curriculum pairs it with clipper technique as a joint required outcome for taper and fade work. Both are required, not one or the other.
Standard barber training teaches scissor-over-comb on wet hair, since it lies flatter and cuts more predictably while you’re still building consistency. Many barbers shift toward dry cutting once they have the reps in, since it shows the hair’s real fall and texture in real time.
Typically, hair is cut wet for this process- it lays flatter and behaves more predictably for precision hair work when your consistency isn’t perfect, and smooth cutting comes easier once you’re not fighting product or fly-aways. Both hairstylists and barbers learn to cut wet before dry, and many of us- as we gain experience and reps in the chair – move toward an exclusively dry workflow to give clients the final texture and fall in real-time rather than the wetter, heavier look a damp cut can suggest. Neither is inherently “correct”; wet cutting is more forgiving to learn on, while dry cutting shows your command over the hair.
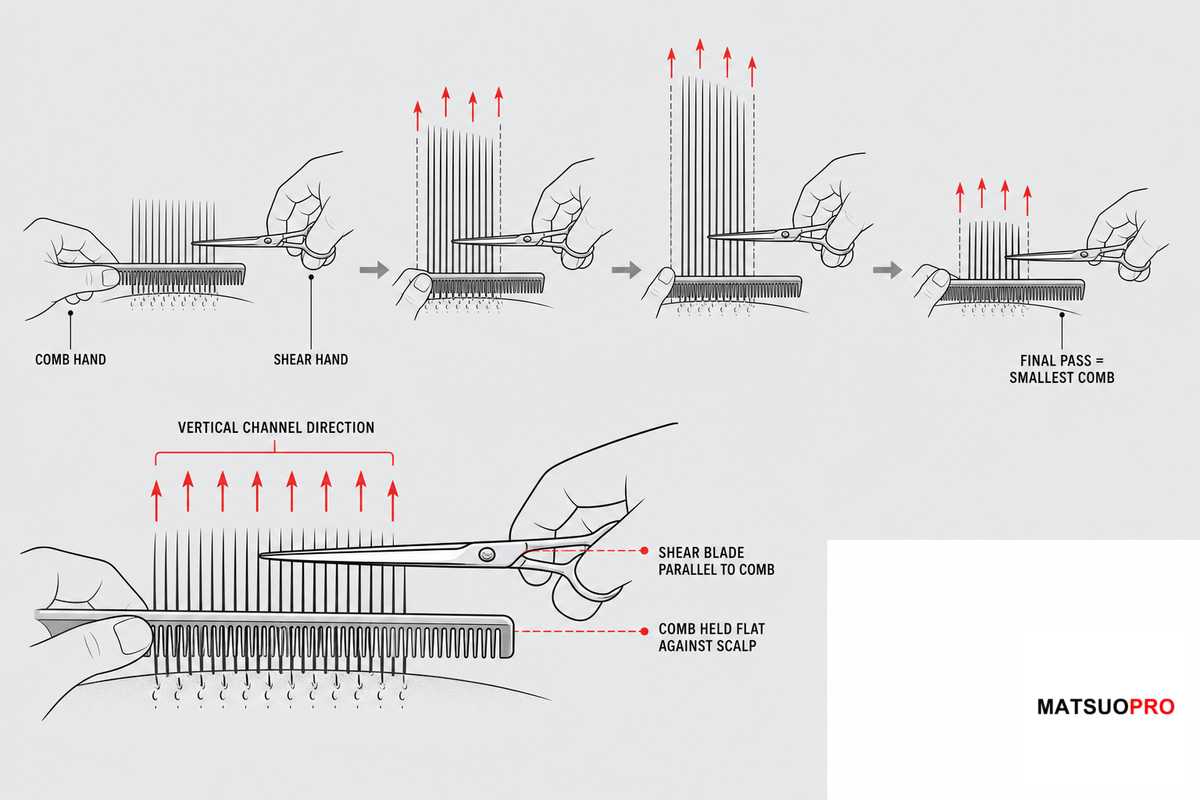
Regardless of the moisture level, once you get past the dry/wet debate, the mechanics of the cut are pretty consistent between barbers and salon stylists alike. At its most basic, a barbering-basics reference puts it simply: Hold the comb flat to the head, and cut with your shears just above it. Barbers turn to scissor-over-comb when they’re after a clean line and don’t want to use clippers. The key to achieving a clean and smooth transition is steady pressure, consistent pacing, and speed – American Salon, breaking down the technique in collaboration with Sassoon Academies, adds that most guides don’t highlight the detail: the comb and shears must move in concert, staying parallel to the hairline, while you work in vertical channels upward from the head base to the perimeter. You’ll transition to your smallest comb in your arsenal for the final pass, graduating the hairline rather than leaving it blunt.
Consider a typical Tuesday-afternoon skin fade, the kind of use case a working barber runs a dozen times a week in the field: a 20-30 minute appointment where the client wants a tight blend from the sides into 2-3 inches of length on top. A barber working this in practice, on the floor, with a 7-inch shear sets the guideline with clippers and a guard first, then switches to scissor-over-comb for the transition zone – running the shear in vertical channels from the hairline upward, keeping the comb flat against the scalp through roughly a dozen passes before the line disappears into the length on top. The blend itself typically takes two to three minutes once the technique is dialed in, most of that time spent on the transition zone rather than the bulk removal underneath it.
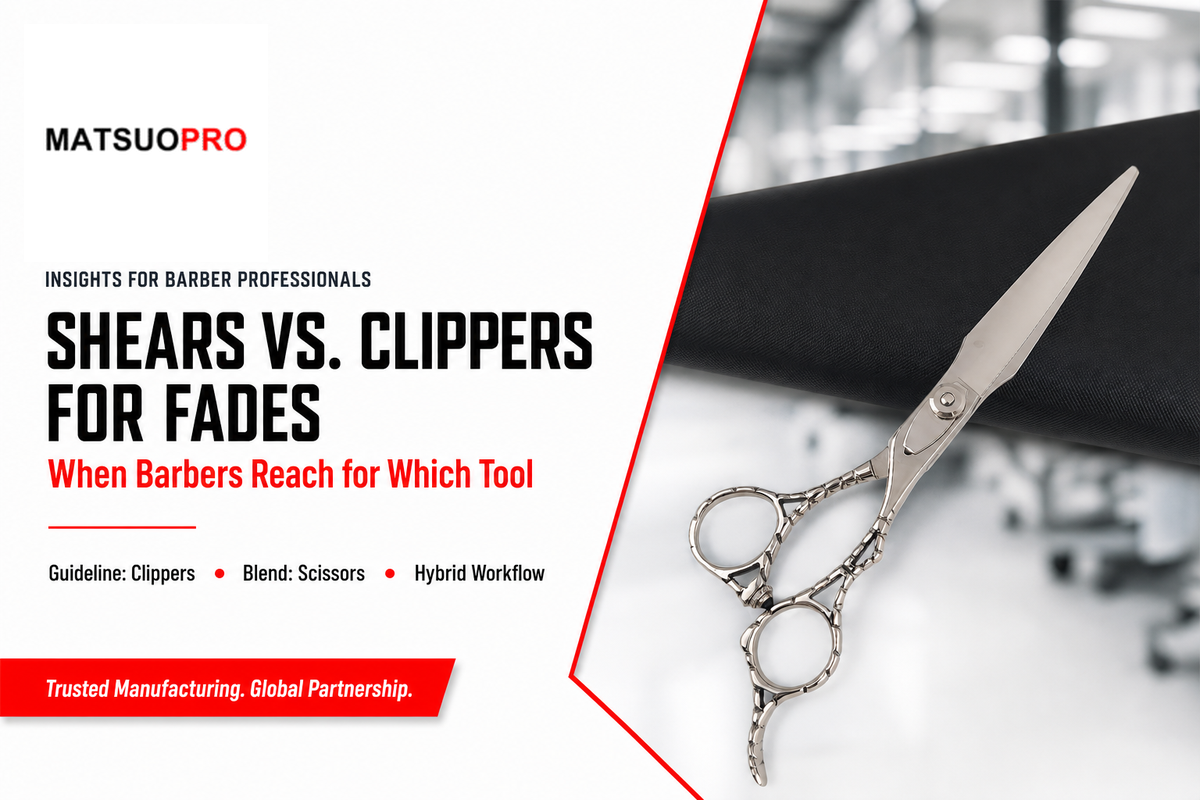
The honest answer isn’t as simple or as binary as most online content suggests. In Utah’s state-mandated cosmetology/barbering curriculum, scissor-over-comb and clipper-work for fade and taper techniques are treated as a single joint outcome. Similarly, in its write-up on bald-fade technique, American Salon shows barbers setting their guideline with clipper and guard before moving to either clipper-over-comb or scissor-over-comb for the blend. In the professional press, it’s common to see barbers treating scissor-over-comb and clipper-over-comb as finishing-method choices rather than mutually exclusive approaches. One barber on r/Barber pushed back on the assumption that fades exclusively rely on the former or the latter, citing the use of thinning shears over comb as a slower but viable option for a specific section.
| Situation | Better tool | Why |
|---|---|---|
| Setting the initial guideline / bulk length | Clippers + guard | Fast, uniform, repeatable length across a wide area |
| Blending the transition zone into longer top hair | Scissor-over-comb | Flowing, uneven-length sections resist the uniform bite of a clipper guard |
| Crown / part transition area | Scissor-over-comb, worked carefully | Practitioners report clipper-over-comb underperforms here — section is prone to looking bulky or sticking up if taken too short |
| Final hairline graduation | Either — barber’s finishing preference | Trade press documents both as interchangeable once the guideline is already set |
Fit, by the way, isn’t solely about comfort. OSHA’s discussion of risks with scissor-over-comb revolves around awkward wrist positions, sustained grip pressure, and contact stress – and more here’s a relaxed grip and an ergonomically neutral wrist held at a comfortable angle across the full length of the stroke, true whether you cut right-hand or left-hand. In the same way that the open-and-close motion is the core mechanic of scissor-over-comb for shaping hair, it’s also the source of the strain (and over time, injury) if your shear doesn’t feel like an extension of your hand and your cutting angle isn’t natural.
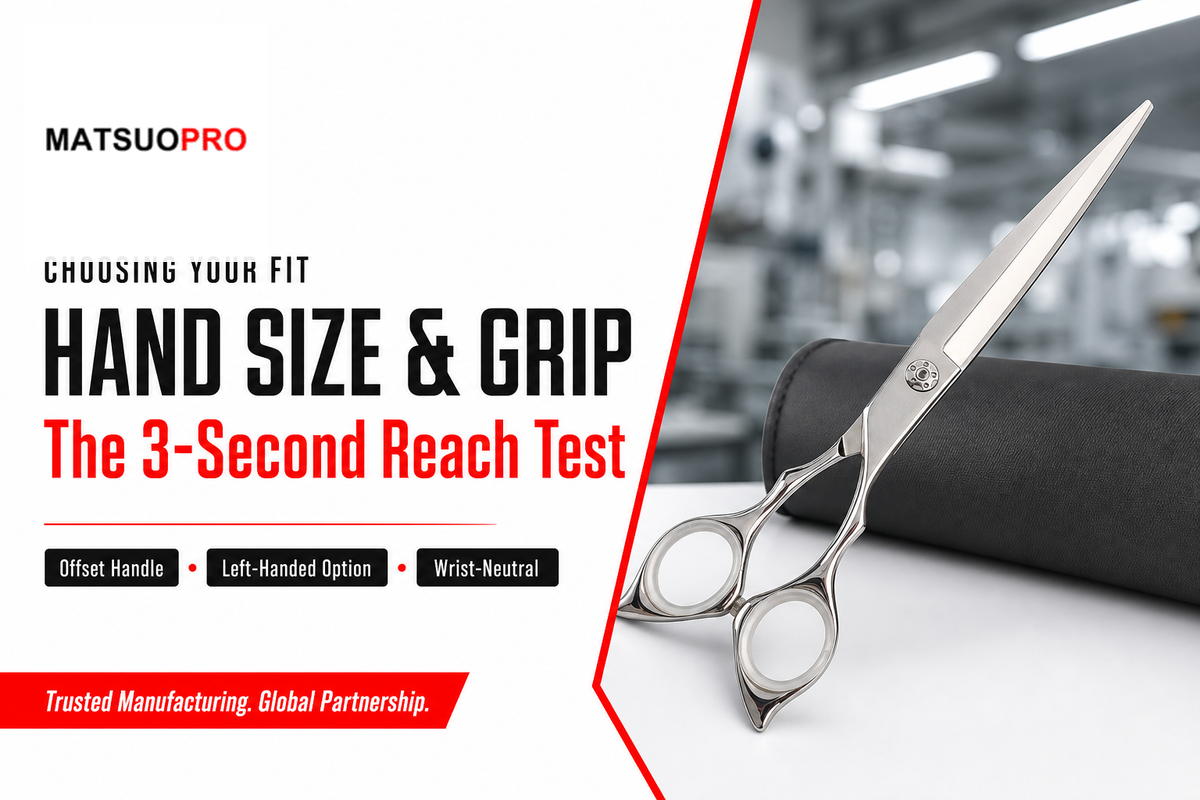
With the comb held flat for scissor-over-comb work, open and close the shear through its entire range without moving your hand. If you reach the end of the stroke before your comb is finished – or if you need to bend your wrist to reach the end – then the blade is either too long, too short, or the handle position isn’t ideal for your neutral angle with the shear. This isn’t a purchase test, it’s a test of shears you’re considering before buying.
Geometry plays into this. Offset handles – in which the thumb ring is set forward of the finger ring – decrease wrist strain compared to offset handles where both rings are on the same plane. Some barber-specific breakdowns indicate swivel handles for added maneuverability for barbers who cut at multiple angles through out the day. Also, keep in mind that professionals don’t just rely on a single shear to complete a haircut. One detailed working stylist explanation of a typical scissor-over-comb cut show a 7-inch shear used for the initial texturizing-based sectioning and a shorter shear brought in for the detail work at the hairline. If left-handed 7-inch options aren’t a stock item where you’re buying, ask before you assume a mirrored build is available, true left-handed shears have mirrored pivot and screw placement and can’t just be stamped differently to appear left-handed.
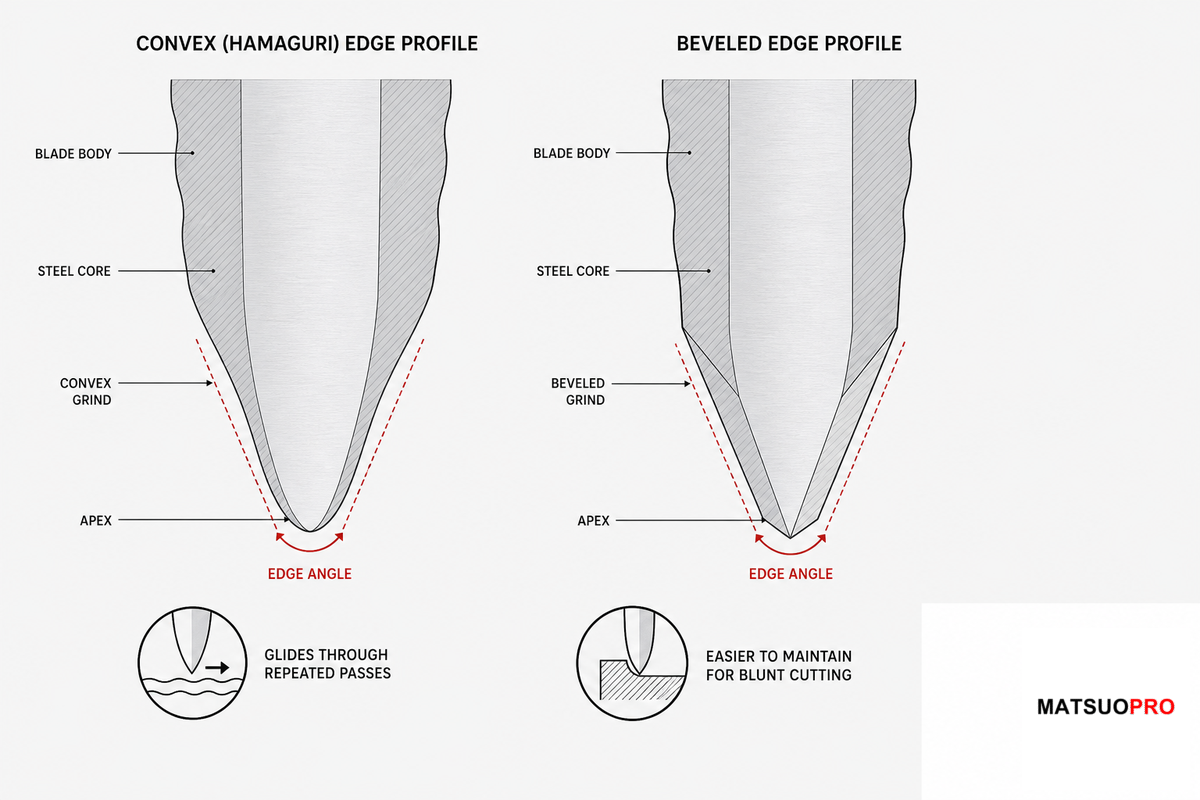
Given that scissor-over-comb require far more open-close cycles than most cutting techniques, edge retention over time in motion becomes the defining metric, rather than just the advertised hardness. The convexity (hamaguri edge) that gives these blades a slide through hair, rather than a bite or snag on repeated passes, makes it ideally suited for this technique, where it’s often less favored for the pure blunt cutting that a razor edge or bevel edge makes easier to maintain. The high frequency of cycles that a shear edge under goes in a busy barbershop vastly outpaces those for a chair cutting occasional hair. While a higher Rockwell hardness number generally suggests a blade that holds an edge and sharpness for longer between sharpenings, the trade-off for that high hardness – be it 440C as an accessible start or VG-10 as a high-end steel – is that it often becomes more brittle and requires a more specialized heat-treatment process to maximize that sharpness retention. That trade-off is detailed in depth, with ranges for Rockwell Hardness (HRC) and sources, on our 440C vs VG10 steel comparison page, as well as on the description page of our Japanese steel barber scissors – no point in re-hashing here where this article is focused on choosing and using, not the metallurgical details.
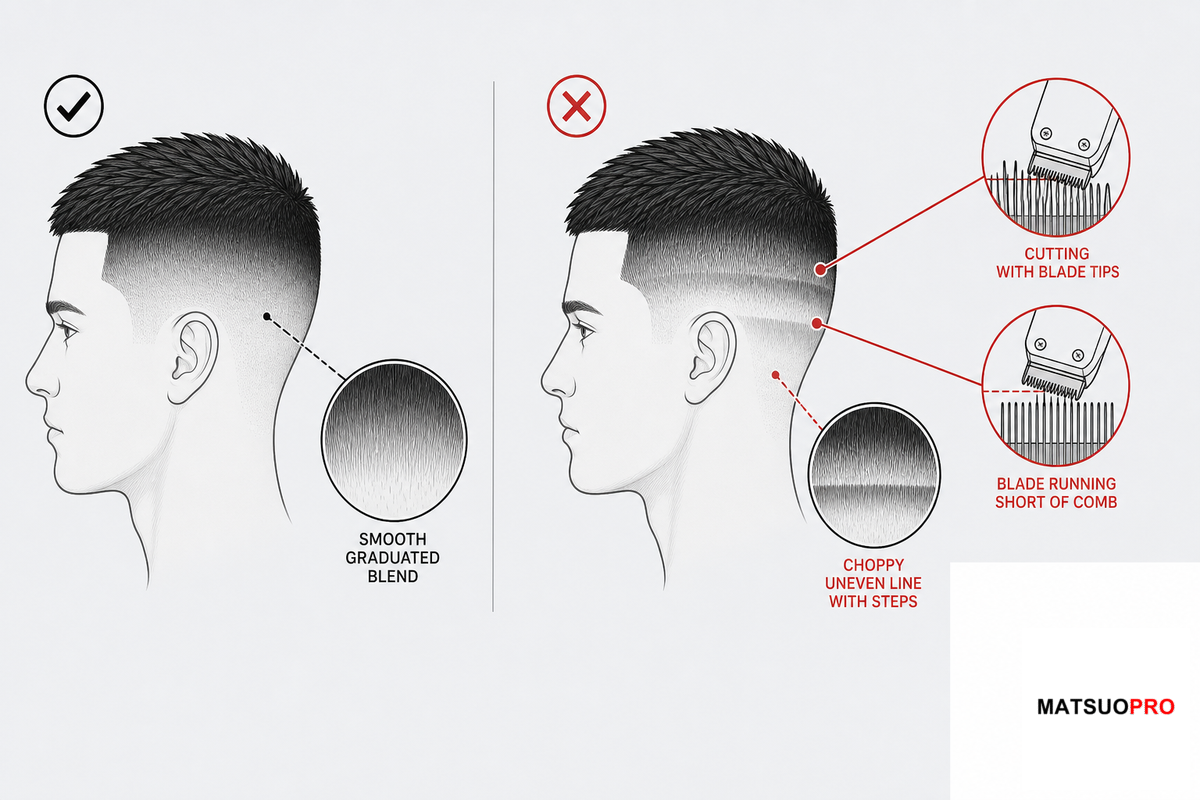
Nearly all of your most frustrating fading problems aren’t a matter of bad luck – in the field, they stem from one of several consistent errors.
Picture a client sitting down for a mid-length fade with a visible crown whorl — hair swirling in two directions at the back of the head. Comb straight back without accounting for that pattern, and the section that looked even in the chair will spring up and look uneven by the next morning, once the client’s own styling routine sets in. One r/Barber thread on this exact trouble spot describes the same failure: the transition zone comes out either too bulky or sticks up, because the section was taken too short in a single pass instead of graduated gradually against the growth direction first.
Keep these two tools in separate categories-scissor-over-comb and thinning-shears-over-comb look similar, but they’re not interchangeable. Scissor-over-comb de-bulks the entire cut and creates the shape with standard cutting shears, whereas thinning and texturizing shears are designed for targeted weight removal in specific areas without significantly reducing hair length. Using the wrong shears leads to over-thinned patches or a fade that never seem to lose the bulk.
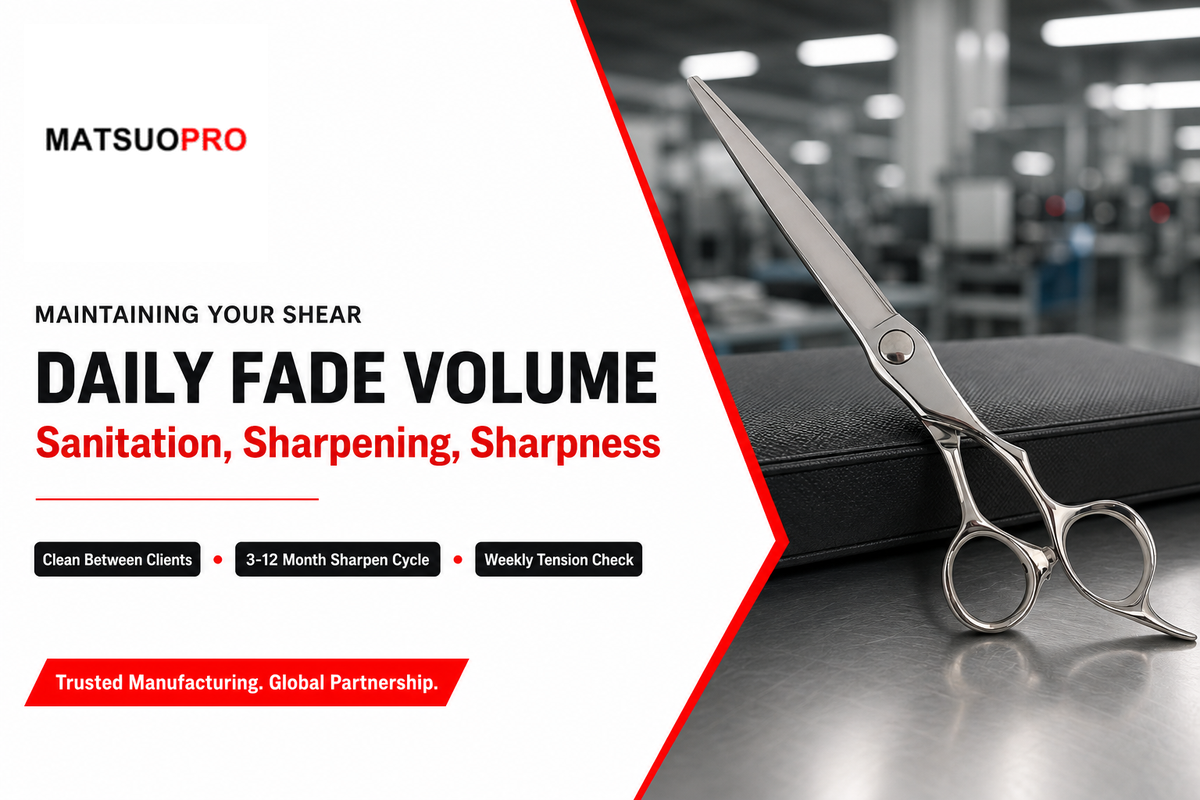
Sanitation comes before sharpening, as it’s mandatory. As per the California Board of Barbering and Cosmetology’s sanitation rules (representative of the standard most U.S. boards apply), your scissors must be cleaned of all debris and sanitized with an EPA-approved disinfectant after each client, not solely at the end of the day. Failure to comply with this rule is grounds for license revocation in most states, regardless of your shears’ blade sharpness.
Mechanical edge durability and sharpness should align with usage, not just the passage of time: Heavy daily use (6+ haircuts/day) indicates professional sharpening every 3-6 months, moderate use (3-5 haircuts/day) every 6-9 months, and light use (under 3 haircuts/day) every 9-12 months, with regular maintenance involving a weekly check of the adjustable screw tension and lubrication every 7-14 days. Keeping your scissors sharp involves not only regular sharpening but also consistent habits.
“Scissor-over-comb puts a shear through more repeated open-close cycles per haircut than almost any other technique we design for – that’s why we hand-hone the convex edge and adjust the tension screw with that exact motion in mind, not just for a single sharp test cut out of the box.”
— Production Technical Team, MATSUOPRO
Hand-honing is craftsmanship, not merely a manufacturing step, and it’s what makes a shear hold up under daily use. Heat-treated, hand-honed scissors retain their edge much longer and can be sharpened multiple times before needing replacement, compared to less-durable models that require replacement upon the slightest dullness. After each use, the cutting edge should be dried and the shear closed and stored – a durable shear will still rust if left wet.
You’re usually required to buy a professional hair shears and thinning shears set as your primary kit when you enroll in a barbering program in the U.S. The board of cosmetology and barbering for Georgia, for example, dictates that a program include 70 hours devoted to cutting and styling techniques – which would necessarily involve instructions in handling shears, thinning shears, and cutting scissors in general – among its total of 1,500 required hours. What you won’t get from a board’s rules, however, is which scissors perfectly fit your hand and hand-over-shear technique – this is determined by fit, not specs. A high-quality barber scissors kit, shopped as shears for hair cutting specifically rather than general kitchen scissors, often makes up for its expense in terms of how long the edge last, rather than through brand prestige alone.
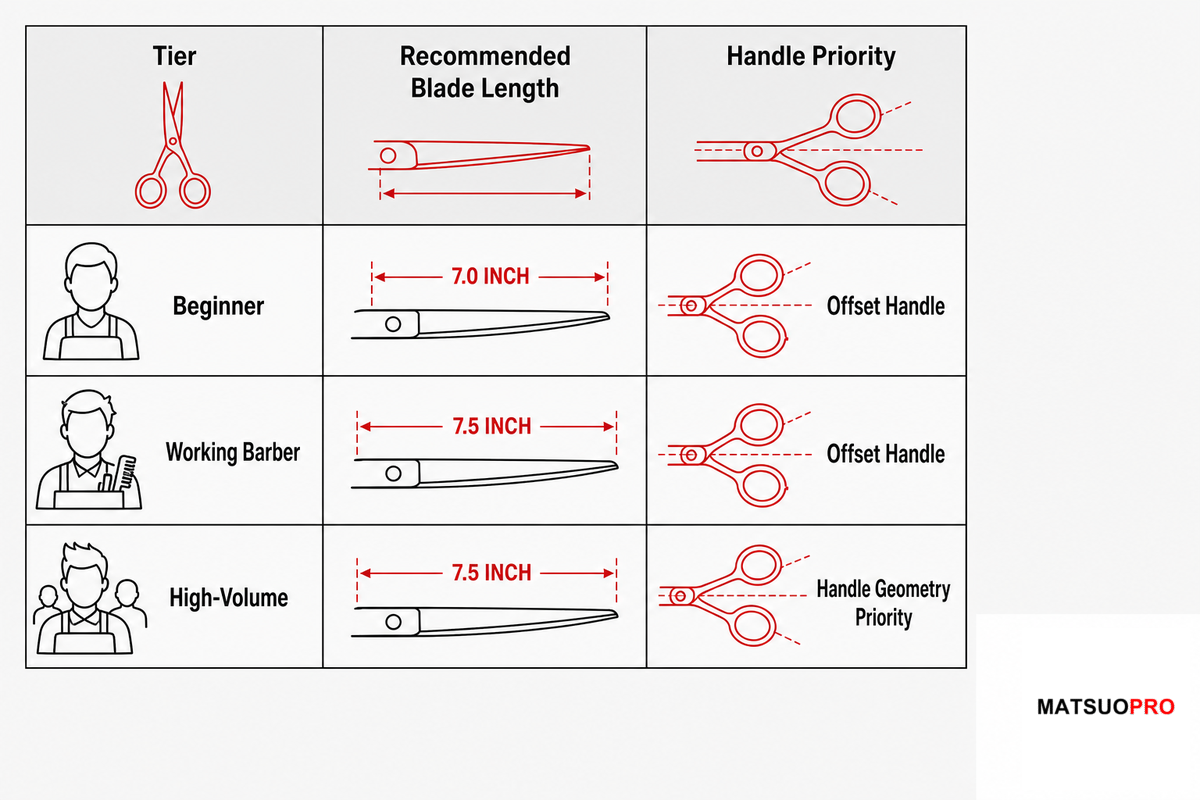
| Barber tier | Typical hair type | Recommended length | Edge / handle |
|---|---|---|---|
| New to scissor-over-comb | Fine / straight | 7.0″ | Convex edge, offset handle for lower wrist strain during practice reps |
| New to scissor-over-comb | Thick / coarse | 7.0″-7.5″ (easier to control than 7.5″ alone while building reps) | Convex edge, offset handle |
| Working barber, mixed clientele | Fine / straight | 7.0″ primary | Convex edge, offset handle |
| Working barber, mixed clientele | Average density | 7.0″ primary + 5.5″-6.0″ for hairline cleanup | Convex edge; offset or swivel handle depending on how many angles you cut from |
| Working barber, mixed clientele | Thick / coarse | 7.0″-7.5″ primary + 5.5″-6.0″ pair | Convex edge, swivel handle |
| High-volume / dense-hair-heavy books | Fine / straight | 7.0″ | Convex edge, prioritize handle geometry — this shear does the most daily cycles |
| High-volume / dense-hair-heavy books | Average density | 7.5″ primary (extended reach for thick sections) | Convex edge, prioritize handle geometry |
| High-volume / dense-hair-heavy books | Thick / coarse | 7.5″+ primary, minimal cleanup pair | Convex edge, prioritize handle geometry |
| Left-handed, any tier | Any | Match right-hand length recommendation above | Genuine mirrored pivot and screw structure required, not a relabeled right-handed pair |
Sourcing wholesale quantities of hair cutting shears for a barbershop or establishing a private-label product line requires different considerations. Here, factors such as MOQ, per-unit price, and certification will play a more significant role than in selecting a single pair. If you’re interested in wholesale, see our 7-inch wholesale specification and procurement guide, and explore our OEM and private-label programs if you’re interested in a custom line of scissors.
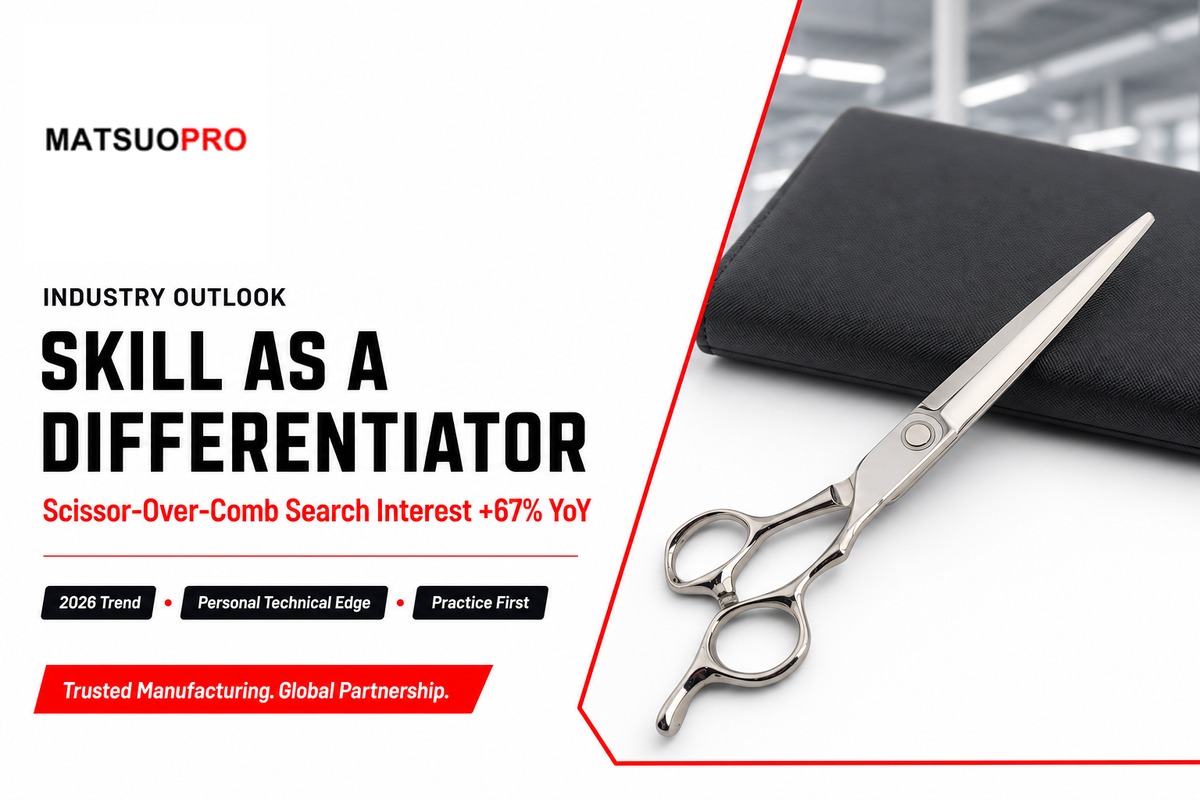
To be clear: data doesn’t strongly suggest a clear career differentiator is being formed based on the skill itself. The U.S. Bureau of Labor Statistics (BLS), when describing the essential skills for barbers – creativity, interpersonal communication skills, and time management – doesn’t highlight skill in specific techniques such as scissor-over-comb cutting as a job market differentiator. However, we can see that barbers, regardless of whether they’re sole practitioners or part of a larger establishment, are investing time in mastering scissor-over-comb:informational search queries for “how to fade with scissors” increased by approximately 67% year-over-year between the second quarter of 2026 and the second quarter of 2025. This surge appears to indicate barbers honing their own skill set for their career, not necessarily as a signal of demand. A 2026 trend report on barbering education reinforces the less direct nature of this trend:technical skills are highlighted as key factors, alongside emerging fashion trends such as sharper fades and more texturized hair, for clients returning to a specific barber.
Treat scissor-over-comb, then, as a personal technical edge worth building for your hair styling repertoire – a way to create more precisely tapered blends compared to clipper-only competitors in your immediate area – rather than as a skill that will directly translate to guaranteed industry accolades or compensation gains on its own. New to it? Start with practice on lower-impact areas of the hair (such as the temples) before implementing the technique for client haircuts.
MATSUOPRO manufactures the 7 and 7.5-inch scissors referenced in this article and, as a result, receives two questions that frame our perspectives on our tools. Barbers ask about technique and fit, and distributors inquire about the wholesale procurement of these shears for their businesses, respectively. This article is the former half of that, with our wholesale specification sheet detailing the latter- reviewed by the Mackay Group Asia Limited technical team.
MATSUOPRO is the Mackay Hair Scissors manufacturing brand for professional hairdressing shears, barber scissors, thinning shears, and pet-grooming scissors. We support salons, distributors, academies, grooming brands, and private-label buyers that need factory-direct production with practical material guidance.
Our buying guides are written to help purchasers compare steel grades, handle styles, blade geometry, surface finishes, logo options, packaging, MOQ, and sample validation before placing an OEM or wholesale order. The goal is to make each scissors specification easier to discuss with a real production team.
Factory-direct supply since 2014, with product lines covering professional cutting shears, barber shears, thinning scissors, texturizing scissors, left-handed models, and pet grooming scissors for international B2B customers.
We focus on Japanese 440C, VG10, and ATS-314 steel choices, convex and bevel edge geometry, ergonomic handle balance, tension systems, logo engraving, private-label packaging, and sample-based OEM confirmation.